Tag Archives: painting instruction

Italian Eating Italian: Intimate Spaces, Breaking Bread Series

Italian Eating Italian – Intimate Spaces, Breaking Bread Series. Acrylic on canvas, 24 x 30. Kit Miracle

Painting a portrait head on is a bit challenging.  However, the distinct lighting of this portrait helps define the features.  The painting has a very robust feeling; a man eating a piece of bread and drinking some vino.

Italian Eating Italian, detail, chin. Notice the reflective light on the chin and neck. Also notice that I rarely use a direct white paint. Most of my whites are mixed to add more vibrancy.

If you look carefully at the closeups, you can see that although I paint in a loose impressionistic style, the brush strokes are sure and vibrant.  I’ve been working with some colorful and contrasting lines which add a bit of spark to the painting.  The colorful outlines are not always related to the painting as far as contrasts go, but sometimes they are.

Italian Eating Italian, detail, hand and glass of wine. Here you see the wine glass, slight angle, gripped by the hand but all loosely painted.

Italian Eating Italian, detail. Hand with piece of bread. The challenge here was to paint a piece of rustic white bread against a white shirt.

This is another painting in the Intimate Spaces – Breaking Bread Series.

Plein air painting in watercolor – tips and tricks, part II

Plein air at Patoka Lake.

It’s a great time to get outside and do a little plein air painting as the season turns from spring to summer here in the Northern hemisphere.  It’s also a great way to socialize while keeping socially distant in this challenging time.  Not to mention getting some fresh air and just enjoying the great outdoors.

In my last post, I discussed some of the background of plein air painting and some general tips.  Today I’m going to elaborate on how to do plein air painting in watercolor.

This is my old Stanrite watercolor easel. The legs are adjustable and it will collapse to a pretty small package. The top tilts which is handy for watercolor since most painting is done horizontally. And it has two adjustable clips to secure your board. I’m not sure if this is made any more but grab one if you see it. This one is at least twenty years old and has proven to be very sturdy and reliable. Stanrite No 5, Watercolor

Plein air painting equipment can be as elaborate or as simple as you wish to make it.  I tend to lean toward simple and light weight.  Instead of using a French easel (which I find heavy and cumbersome), I like to use an aluminum watercolor easel (by Stanright).  The easel has legs which expand to various heights and a top section which tilts to many angles.  The top also has two clips for securing my watercolor board.

My favorite watercolor paper is d’Arches 140 pound cold press.  For ease of transport, I cut the 22 x 30 inch sheets into quarters and attach them to a luan board which is a little larger.  I find trying to paint outdoors on full size sheets of paper to be awkward but that is just my preference.  Since the smaller paper is only about 11 x 15, it can easily be attached to the board by painter’s tape or clips and does not need to be stretched to prevent buckling.

Plein air watercolor equipment that I keep in my bag. See the list in the body of the post.

I usually keep a bag packed with items just for watercolor painting.  I find this helps speed up the process of packing when I’m ready to get out of the house.  The bag I use is a multi-pocket computer bag which I bought for $5 at a resale shop.  It has a nice shoulder strap which is very comfortable and plenty of zippered compartments. I removed the extra padding.

The used computer bag that I use as a plein air bag for watercolor. I love the many zippered pockets and the comfortable, adjustable strap. I paid $5 for this at a resale shop. Then removed the foam padding.

A very big help to me is that I have color-coded index cards for each type of plein air painting that I do.  This helps to remind me what I need to take just in case I have removed something from my bag.

My list of items to take in my watercolor bag are:

Easel

Chair / stool

Umbrella / bungees

Bag

Paper

Support

Clips

Watercolor travel palette (Mijello)

Brushes -assorted

Paints – assorted

Water and collapsible  cup

Spray bottle

Pencils/pens

Sketch book

Tape / clips

Multi-tool / pliers

Paper towels / cloth rags

Sponge

Bug spray

Sunscreen

Hat

Camera / cell phone

Apron

Scissors / knife

Snacks

Business cards

Some folding green stuff (money)

Band-aids


Even with my list, I have forgotten items before.  Once I forgot my collapsible water cup so I cut a spare water bottle in half.  The bug spray will be really welcome if the mosquitoes or flies find you.

Various layers of clothing might be warranted if the weather is likely to change, as is a poncho, etc.  I always keep a travel blanket in the car which I have found handy to wrap up in on particularly windy or chilly days.  The bungees can be attached to your bag and easel to prevent it from flying away, or used to secure your umbrella to your chair for shade.

I usually use a small sketchbook to make thumbnail sketches but sometimes I’ll paint in a watercolor notebook.  It’s important to be flexible and not get bummed out if you forget something.  I have a friend who paints with sticks (and the results are amazing).

Depending upon where I’m painting, I might even take my Square-card reader…just in case a passerby decides that they must have that painting right then and there.  Be prepared, I always say.

All in all, the whole kit – bag, easel, chair, etc., weighs about twenty pounds or less.  Although I’ll throw some things into the car, I don’t always  lug everything out.  For instance, a rock, bench, log or wall might be the perfect seat so I can leave the chair.  Maybe it’s too windy for an umbrella so that stays in the car, too.  But I do like to have these things with me, just in case.

I have even been able to organize all my equipment into a couple of panniers for my bicycle.  Then I can really tool around without even looking for a place to park.

Bike with panniers and equipment for plein air painting. I don’t do much of this anymore but I put thousands of miles on my bikes. With the distraction of cell phone usage now, it’s a little too scary to bike regular roads.

https://www.jerrysartarama.com/mijello-fusion-air-tight-watercolor-palettes

https://www.jerrysartarama.com/faber-castell-clic-and-go-cups-brushes

I can’t find the Stanrite No.5 Watercolor easel anywhere but there are some other makes available.  I would opt for the light-weight aluminum over the wood.  You might also be able to find a used one on Ebay.

Plein Air Painting – Tips and Tricks

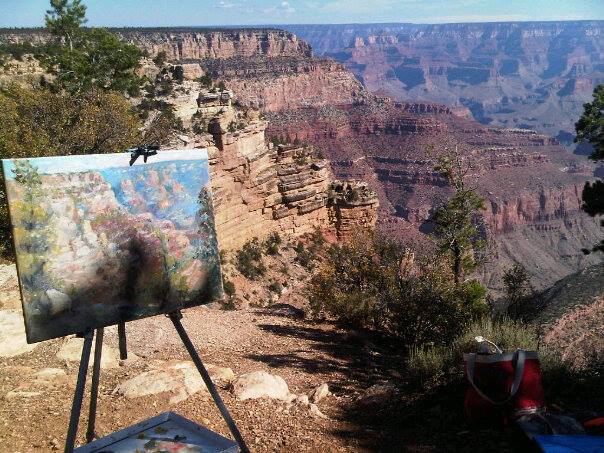
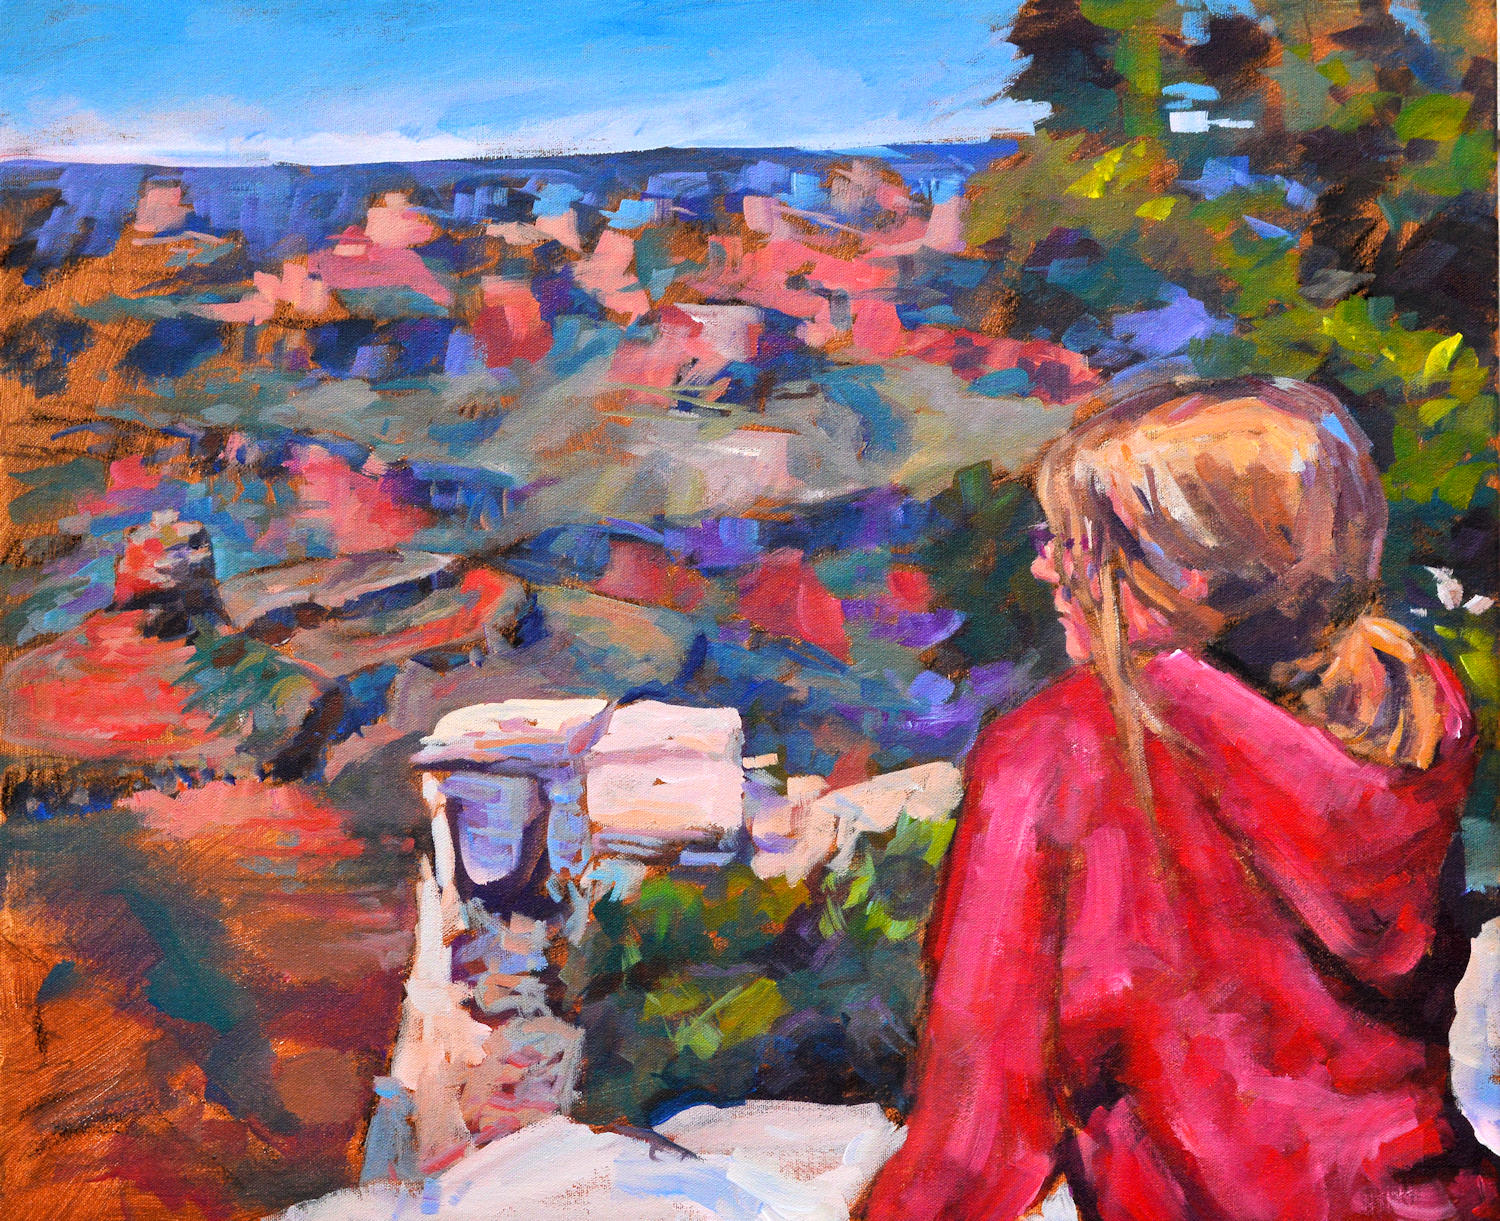
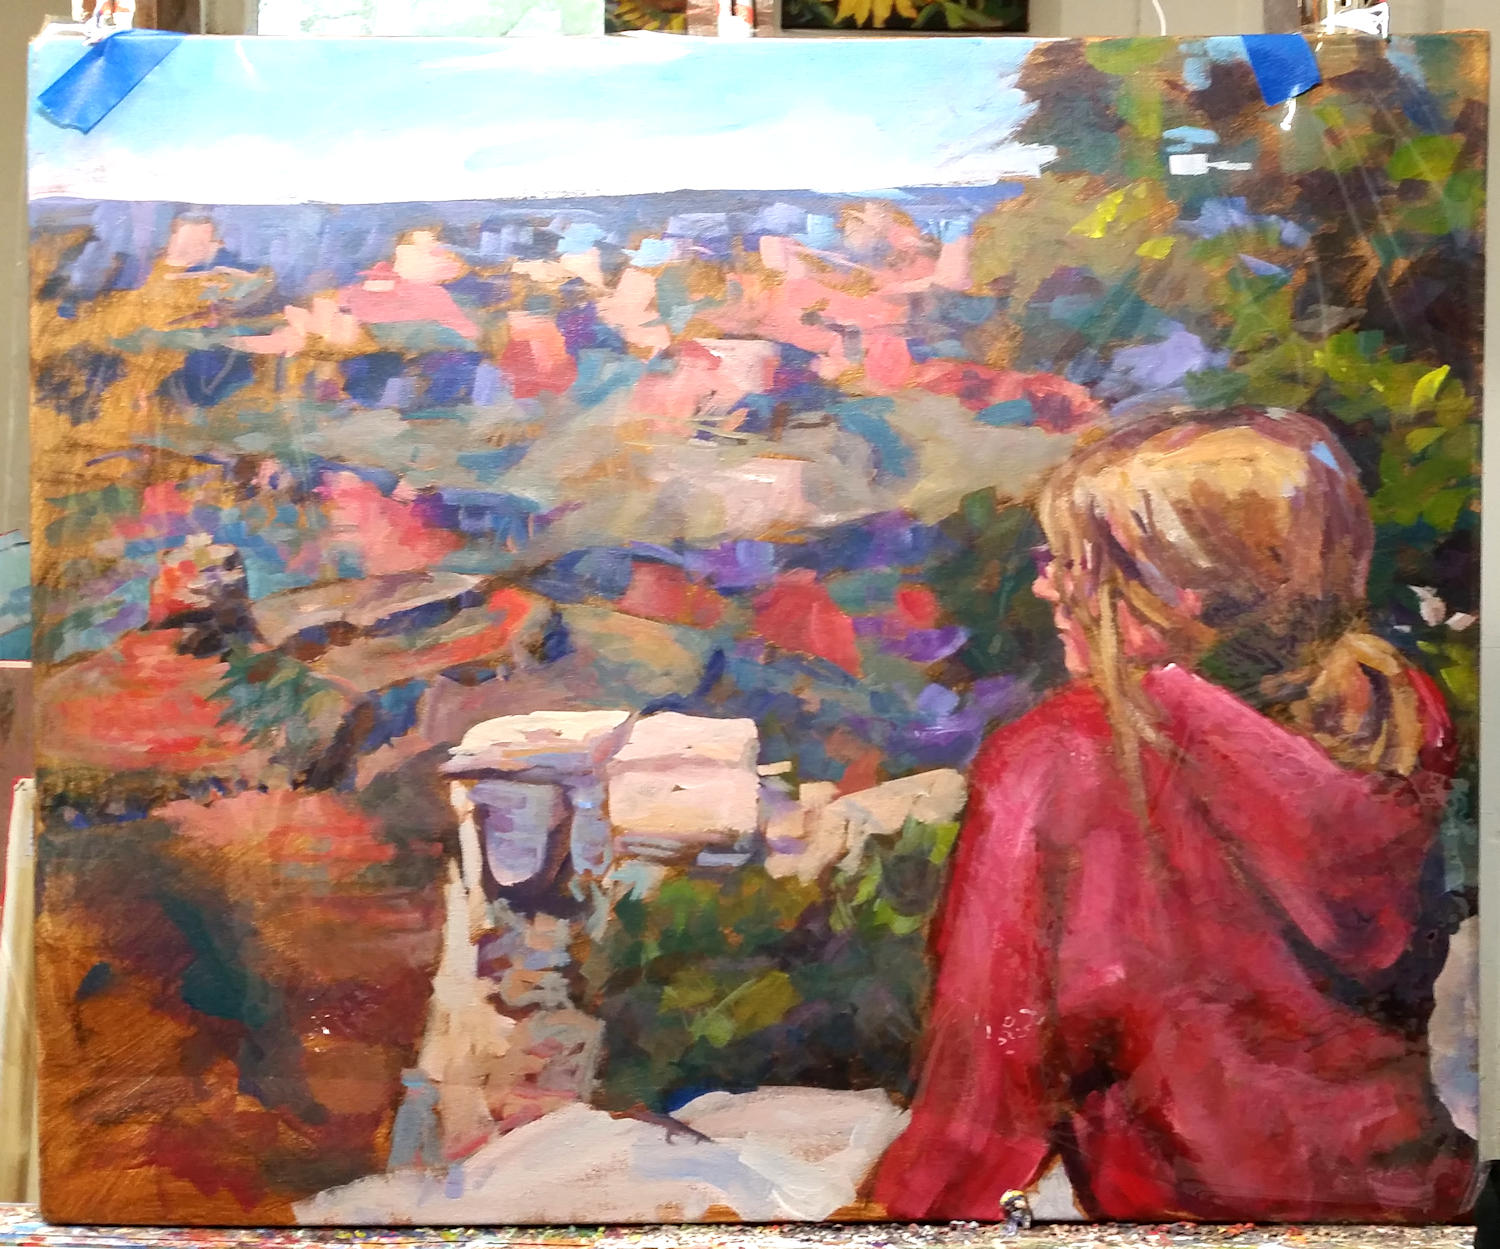
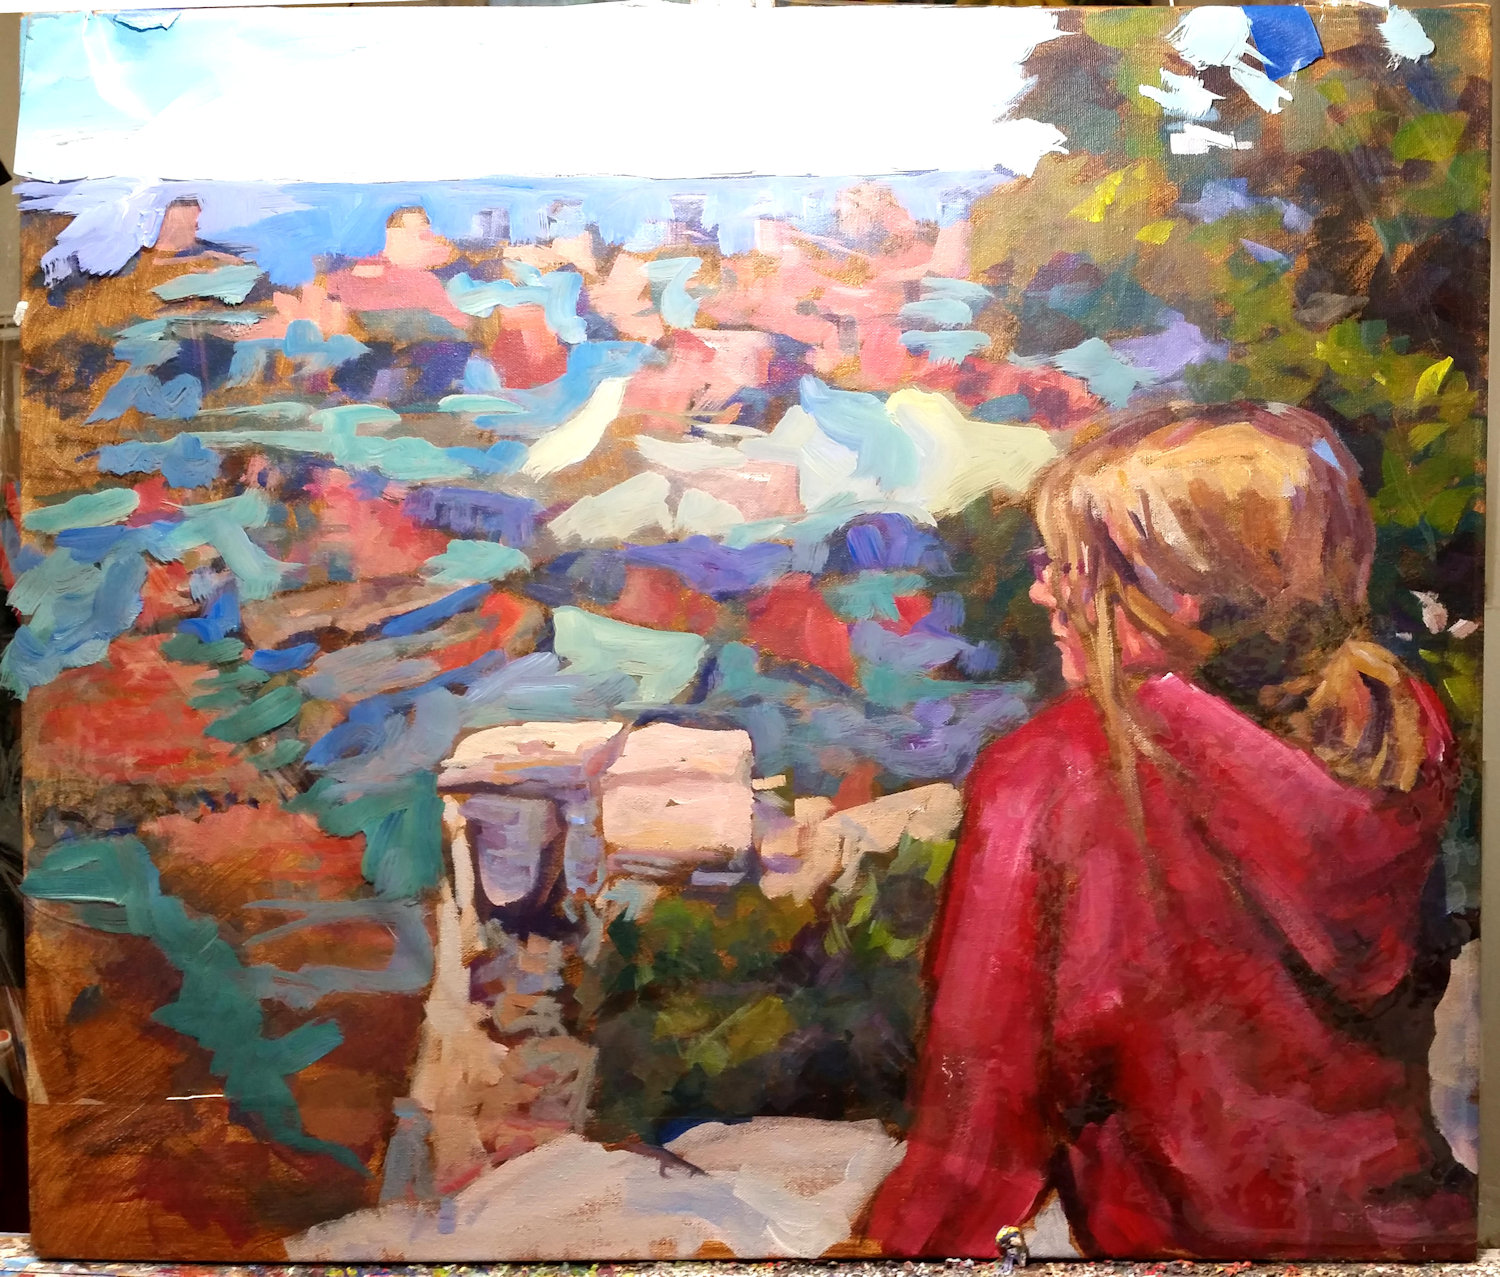
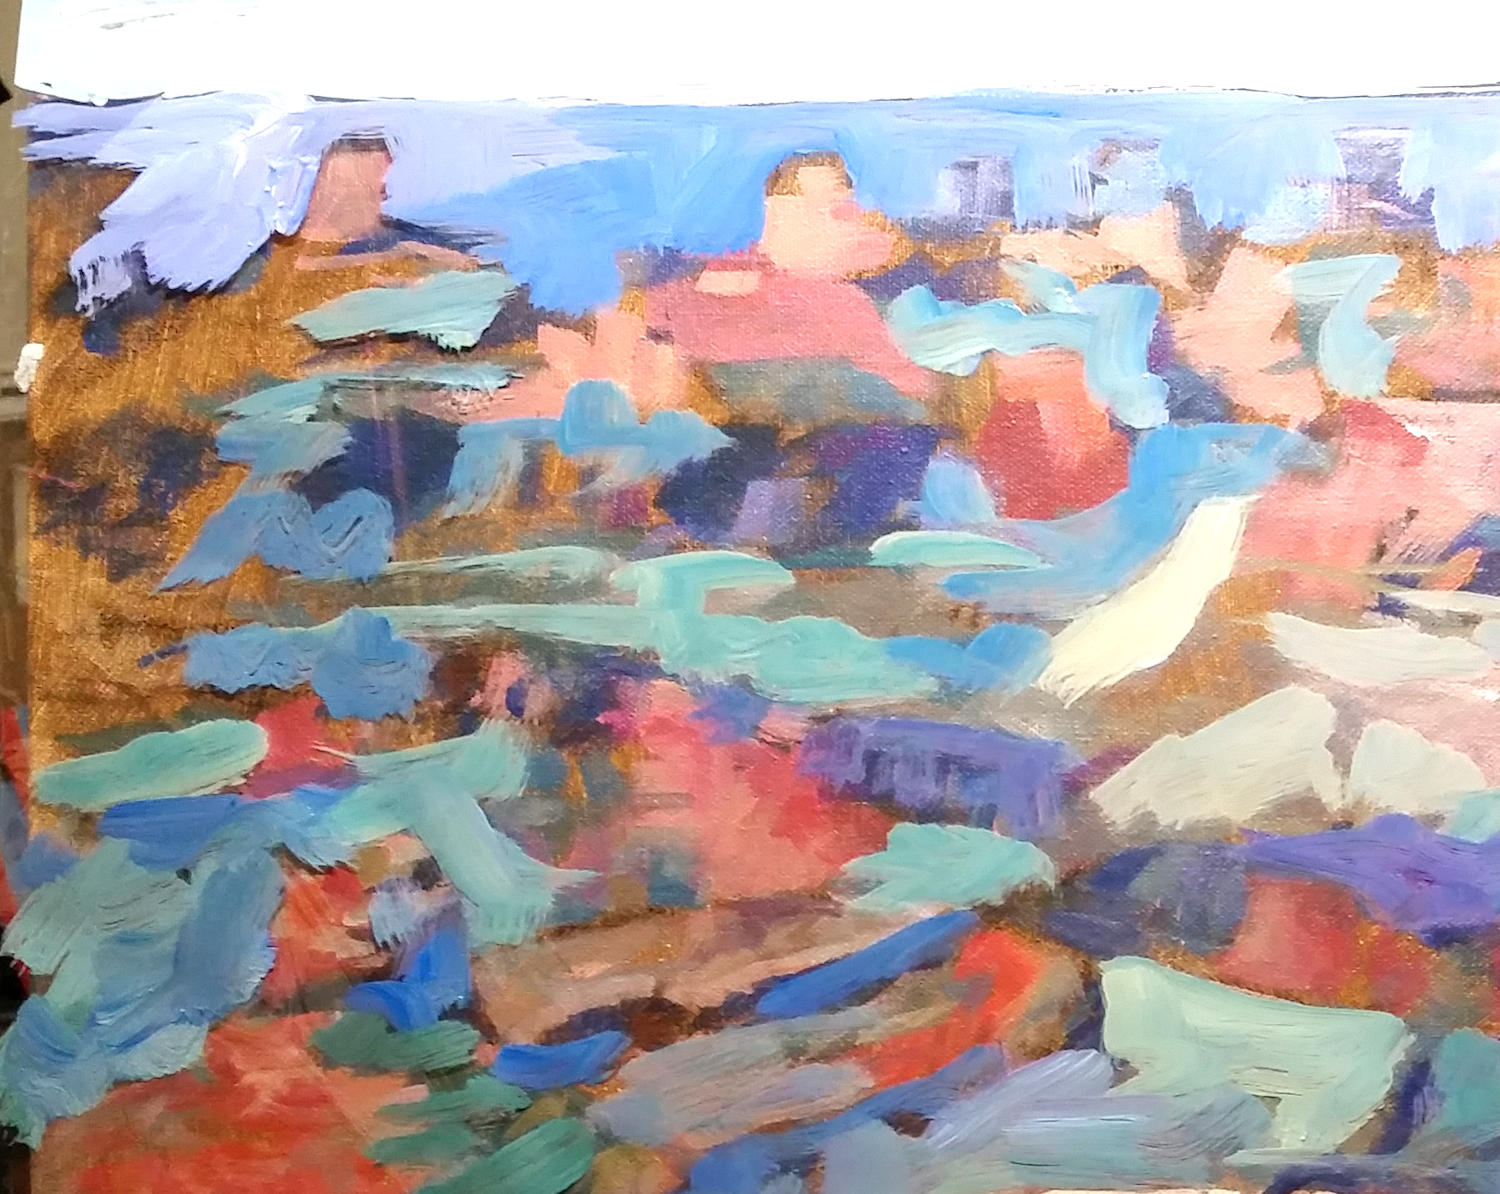
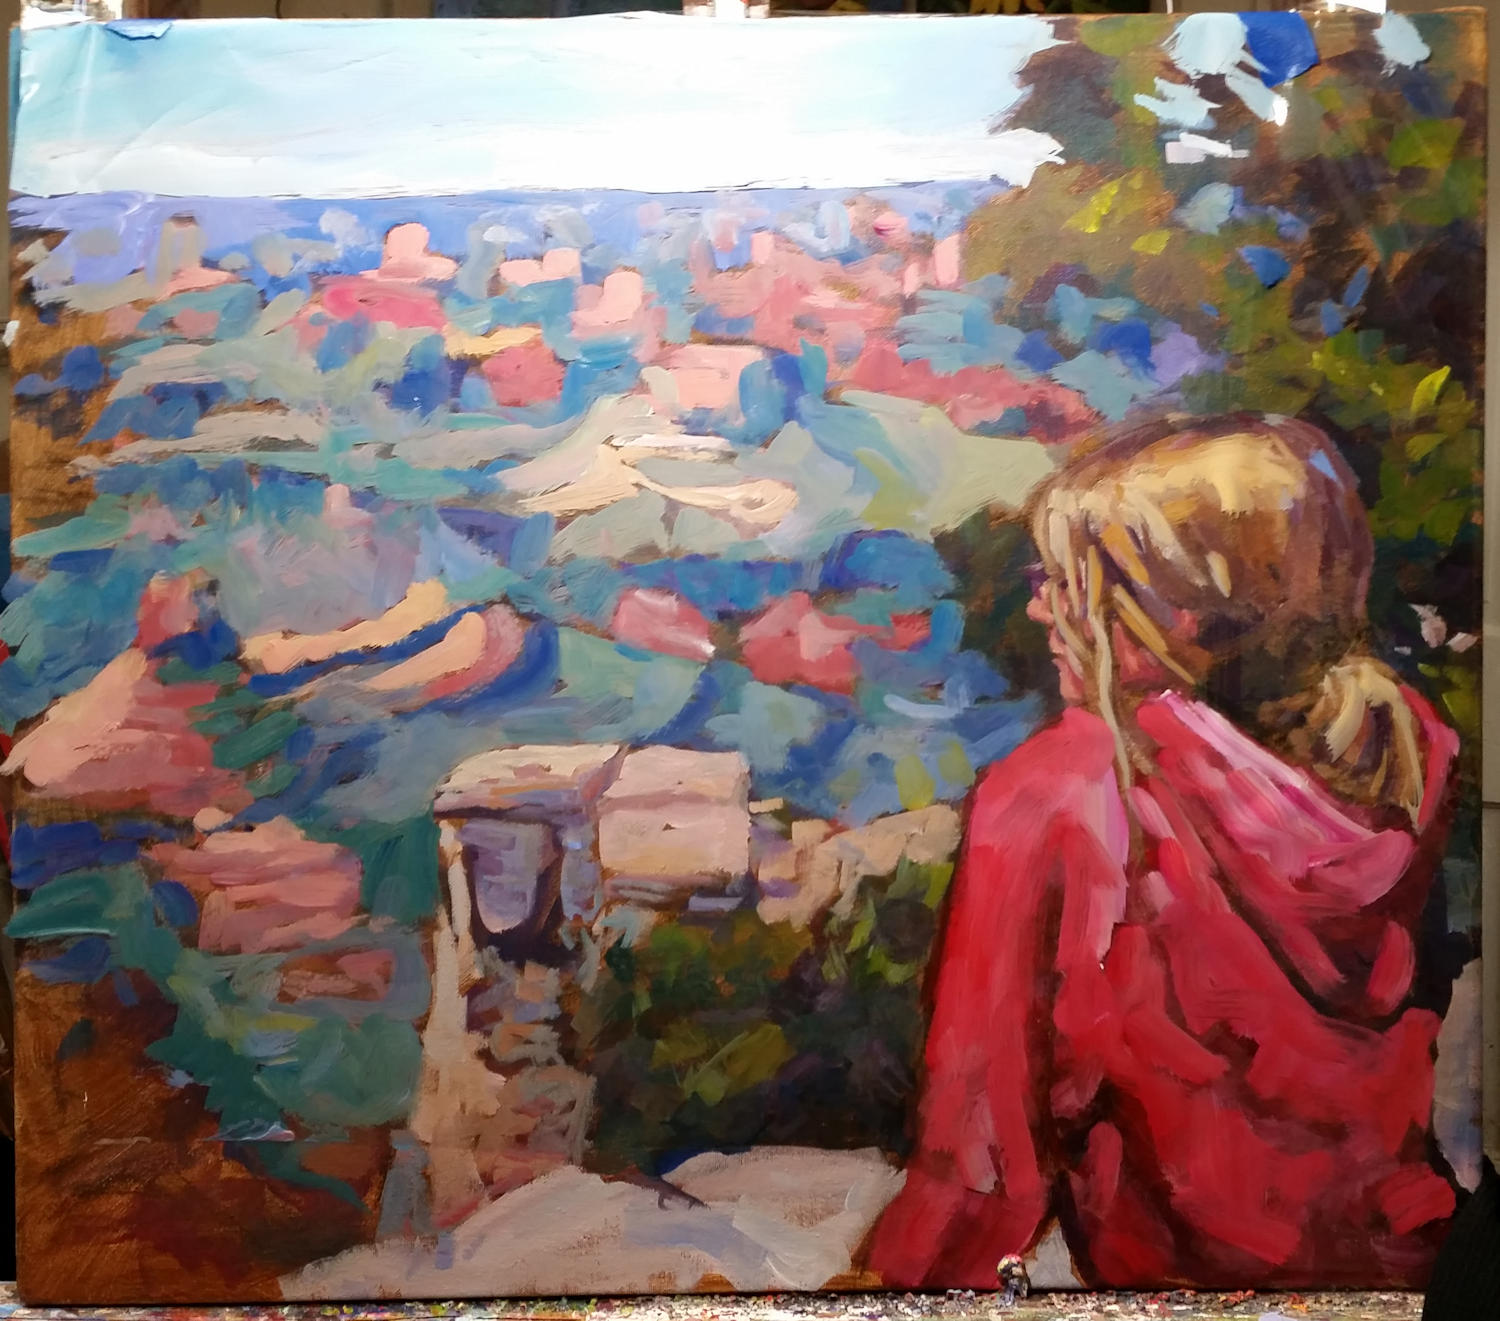
Perched on the edge of the Grand Canyon. This was from 2011 but I went back to the same spot last year. Not much had changed.

I have been painting en plein air for many years.  This is just a fancy French term for outdoor painting. The practice has been around for a couple of centuries but the activity has really exploded in the past few decades.  There are magazines and organizations, contests and exhibits of plein air paintings all over the world.  This doesn’t even take into consideration the books, videos, YouTube, and other outlets for this art activity.

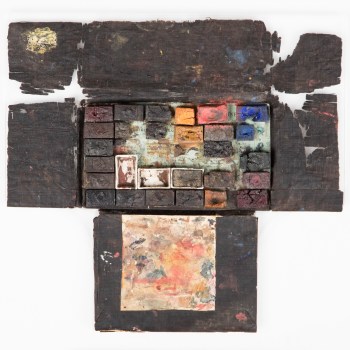
Turner, J.M.W.; Travelling watercolour box owned by J.M.W. Turner, R.A This little watercolor box is a couple of hundred years old.
Credit line: (c) Royal Academy of Arts

Over the years I’ve had many people say to me, I wish I could do that.  Well, I’m here to tell you that you can.  You just have to start.  This will be a three part post about helping you get over the hurdles and begin painting outdoors.  Today I’ll cover some of the basics, including equipment, drawing, where to go, etc.  Then the next  post will cover watercolor and the final post will add tips for acrylic or oil painting.

So let’s get started.

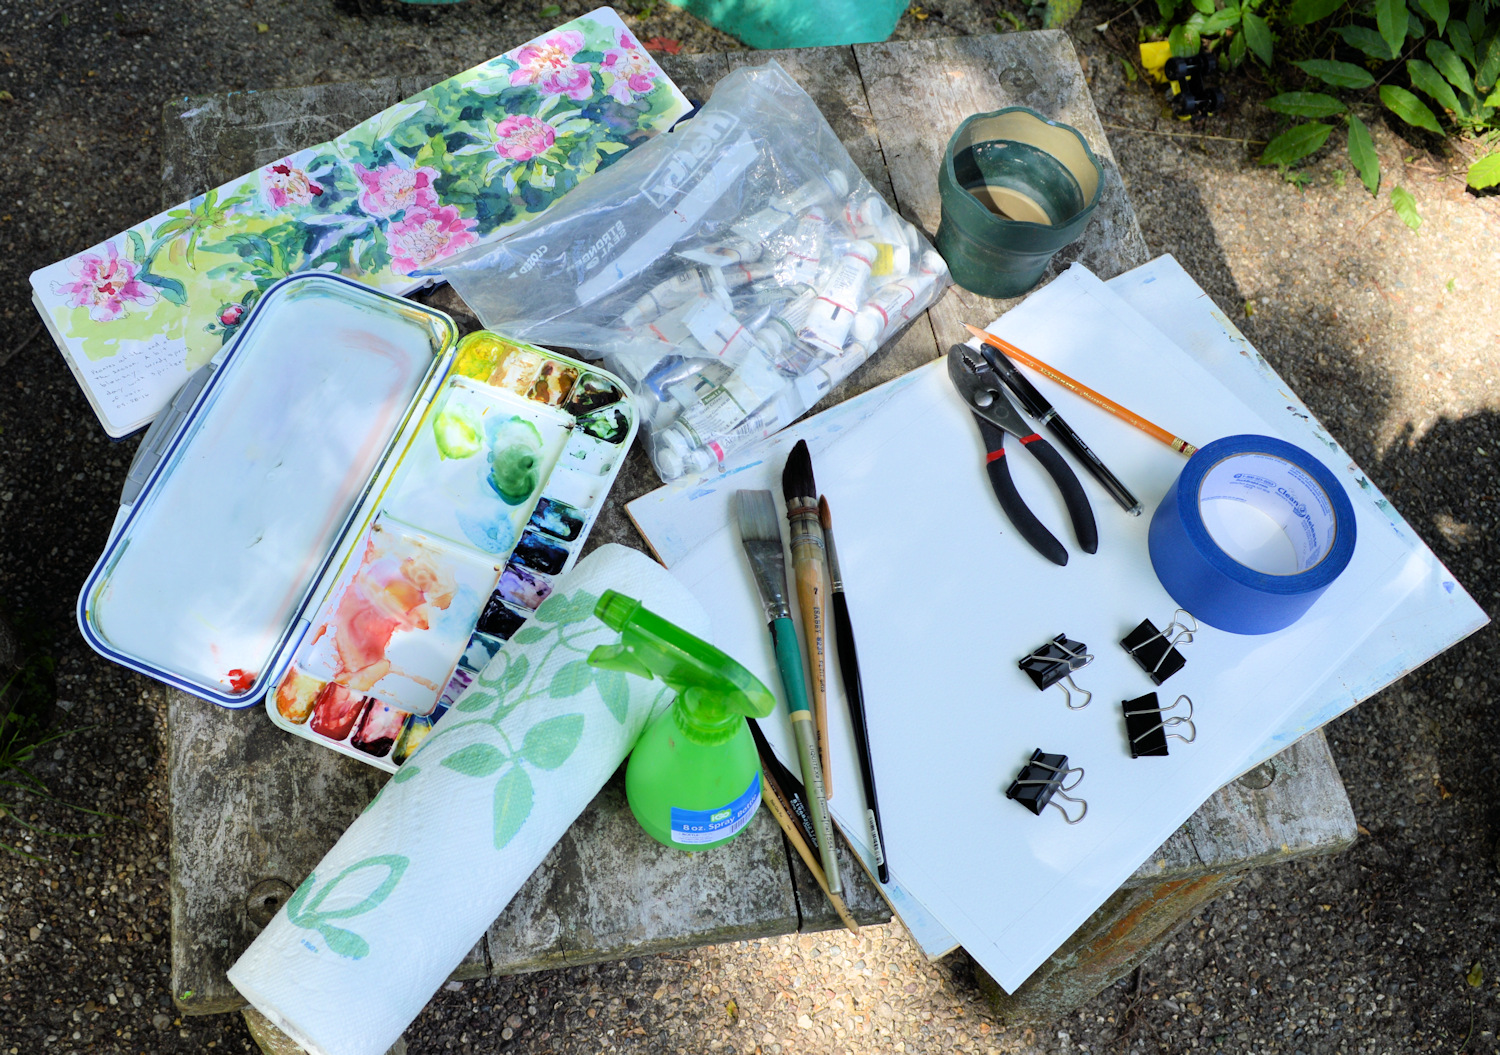
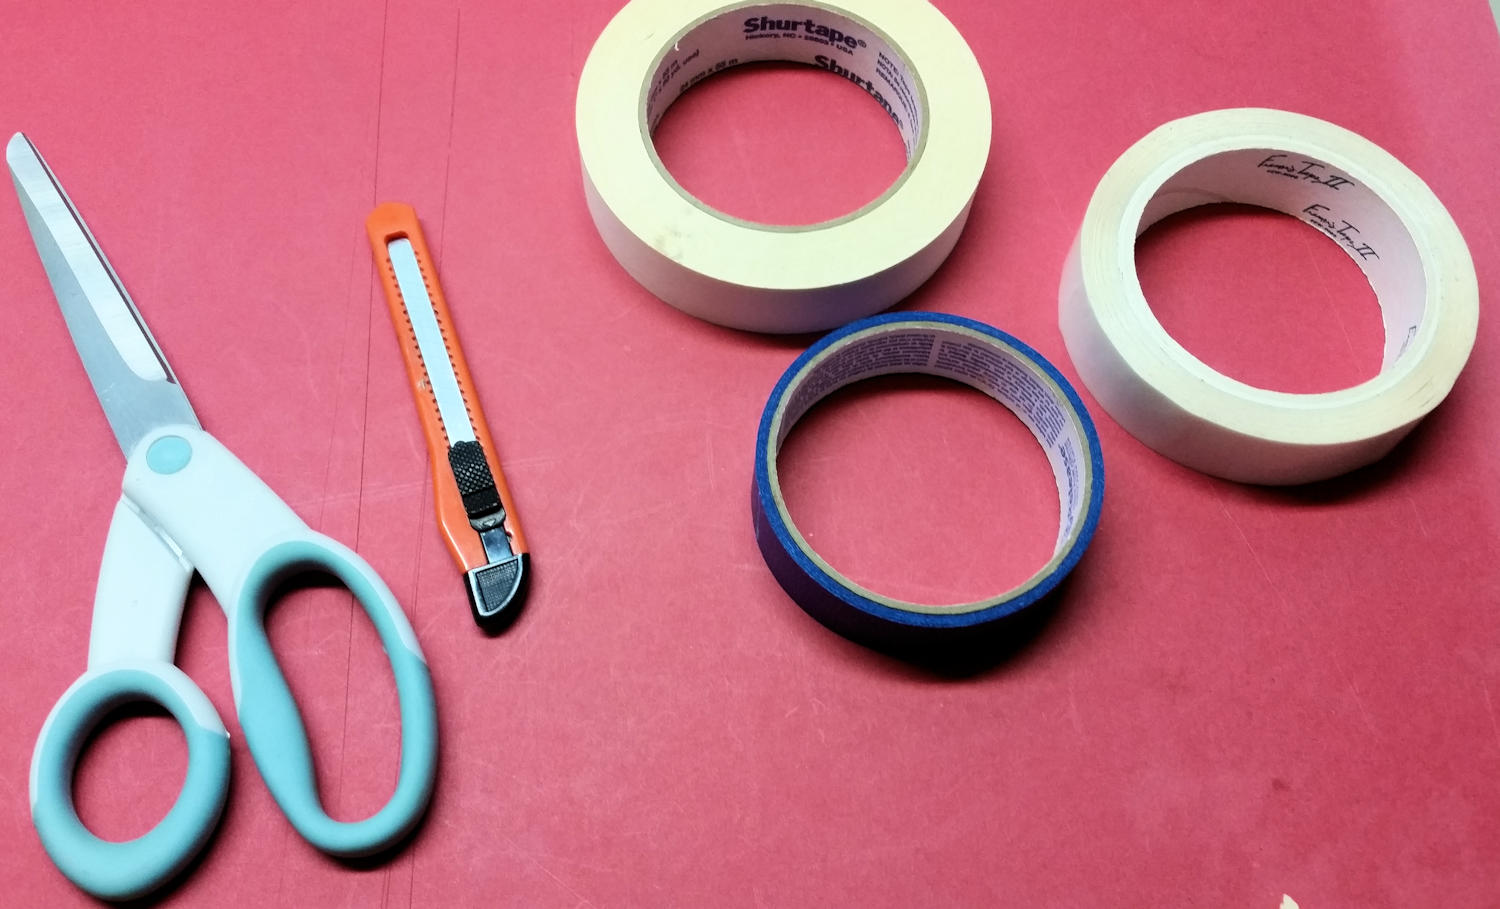
What kind of equipment do you need?

This can be as simple or as complicated as you want to make it.  A sketchbook and a pencil or pen is a good place to start.  Just get used to carrying one with you all the time.  One of my favorites is a small hardback sketchbook (ProArt) which is only about 3.5 by 5 inches.  It’s small enough to fit in a purse or pocket.  I’ve used it on beaches and mountains, in museums, restaurants, and theatres.  (Not all plein air painting is done outdoors.)  It’s good practice to just to sketch.  It trains your eye to see.

From a simple sketchbook you can climb up to spending a whole lot of money on fancy easels and other equipment.  But you don’t have to and it won’t necessarily make you a better painter.

My personal philosophy is to keep my equipment portable and lightweight.  I currently keep a backpack or other carrying bag (purchased used at a resale shop) packed for each type of medium I use.  The messenger bag that I use for watercolor was $5 at St. Vincent de Paul.  The bag I use for acrylics or oils is an old backpack.  I even keep a backpack with gear for framing if I should be at a competition where I need to submit a framed painting.

I have a couple of lightweight aluminum easels, one for watercolors (it tilts) and the other for vertical works on canvas or board.  They have extendable legs and even have spikes which are handy for anchoring your easel.  But, you can use your lap, a rock or fence, or other handy surface to support your work.  You can even make your own.  (Check here for instructions from James Gurney.)  I carry my easels in a bag that I made from an old pair of jeans.  You can’t imagine where that bag has traveled.

A stool or portable chair is also handy.  It can get tiring standing for several hours and I’d rather be comfortable.

Painting at Jackson Lake, Wyoming. I was watching for bears but sure don’t know what I would have done if I saw one.

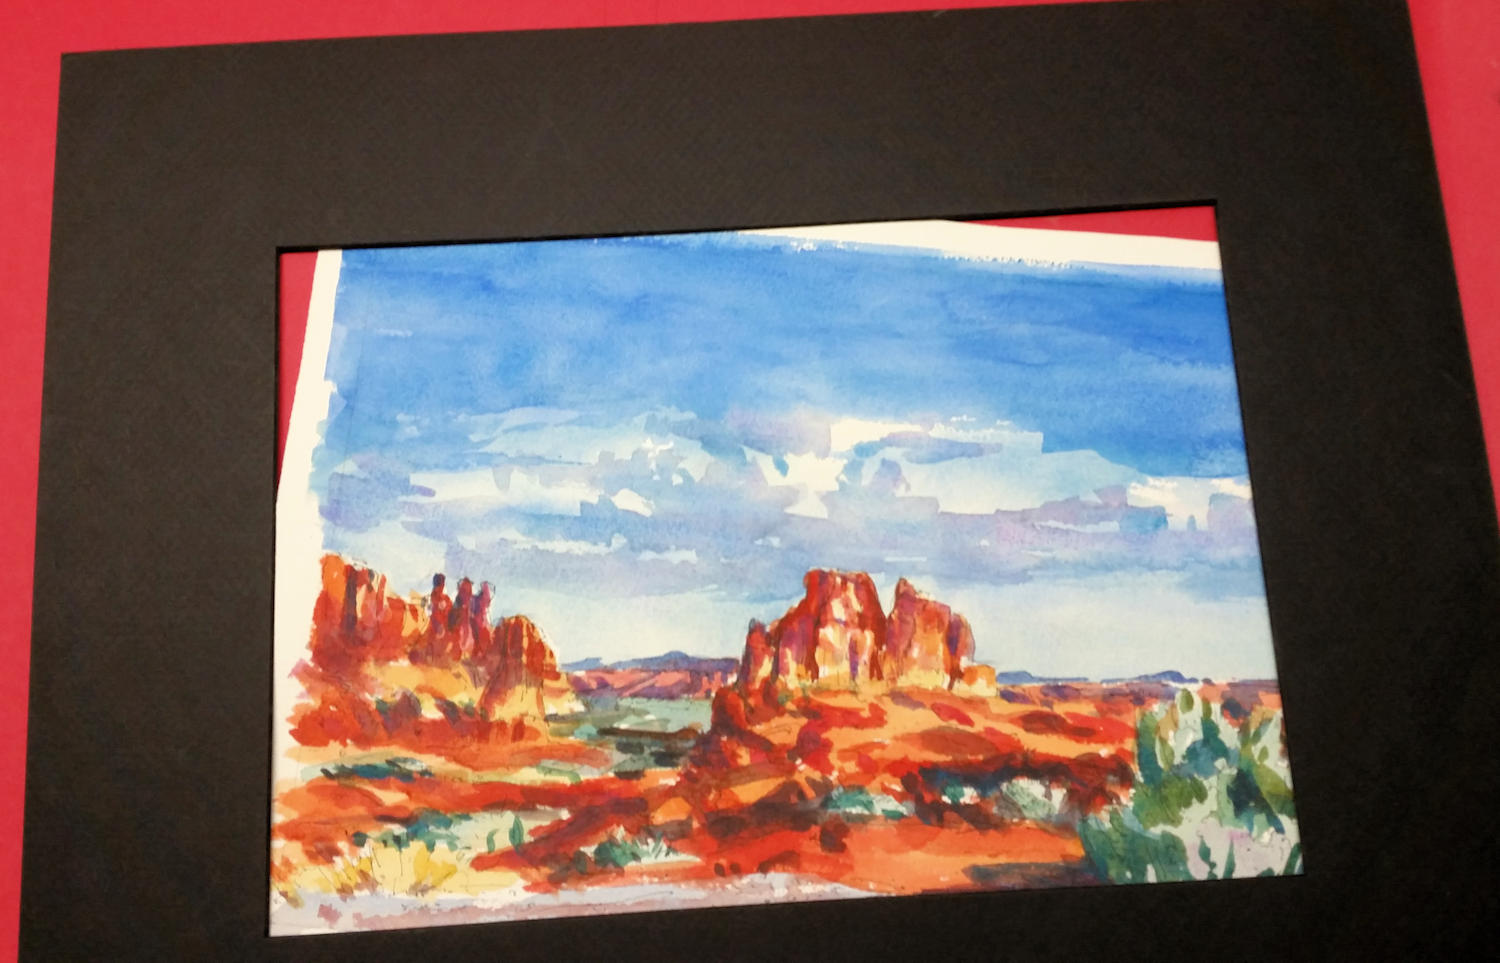
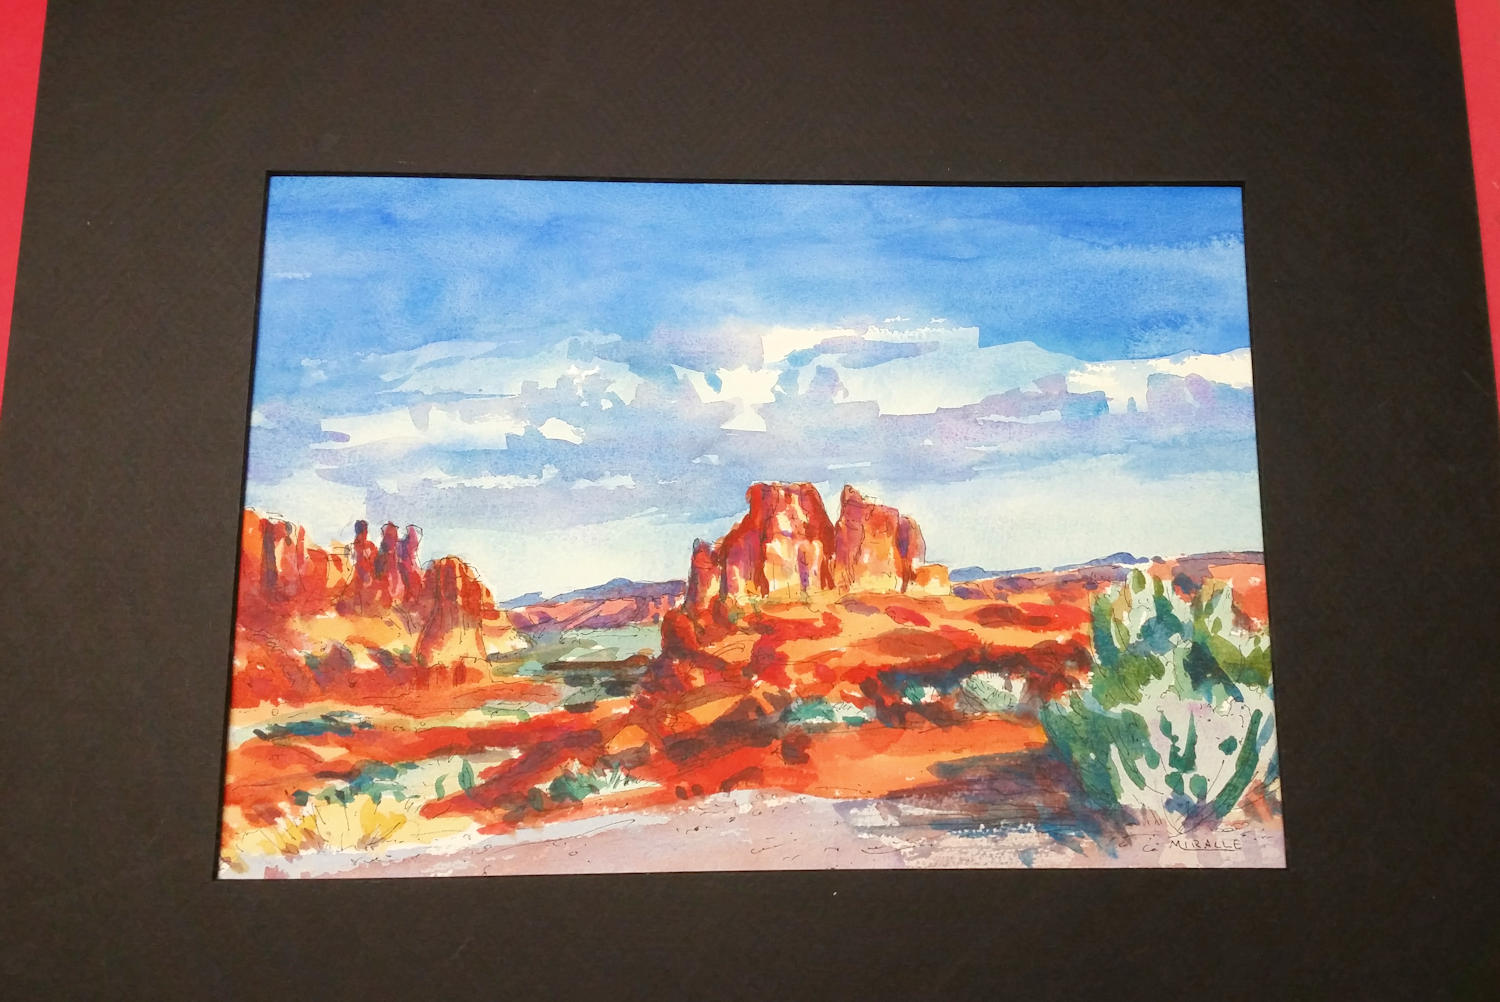
Cathedral Rock, Arizona.

Where should I paint?

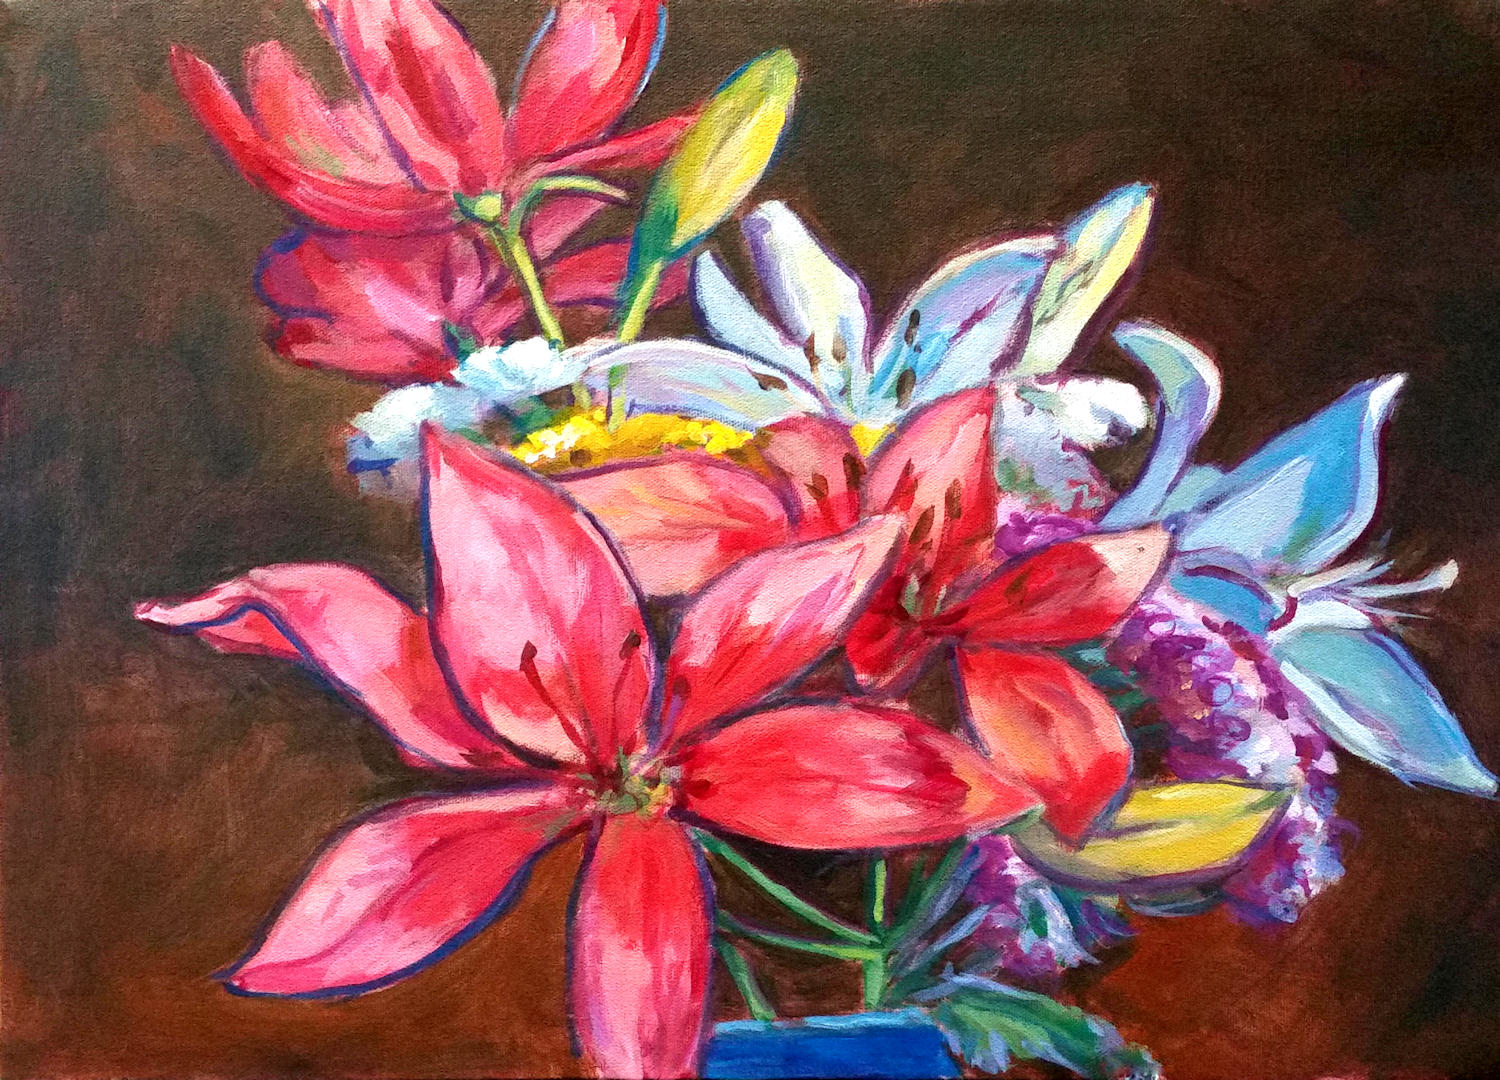
Frankly, anywhere you want to.  If I don’t have much time, I’ll just go out in the yard and paint some flowers, or trees, or landscapes.  I’ve dragged my equipment all over the country and even to France.  I’ve even rigged up a way to pack it on my bicycle and travel with it.

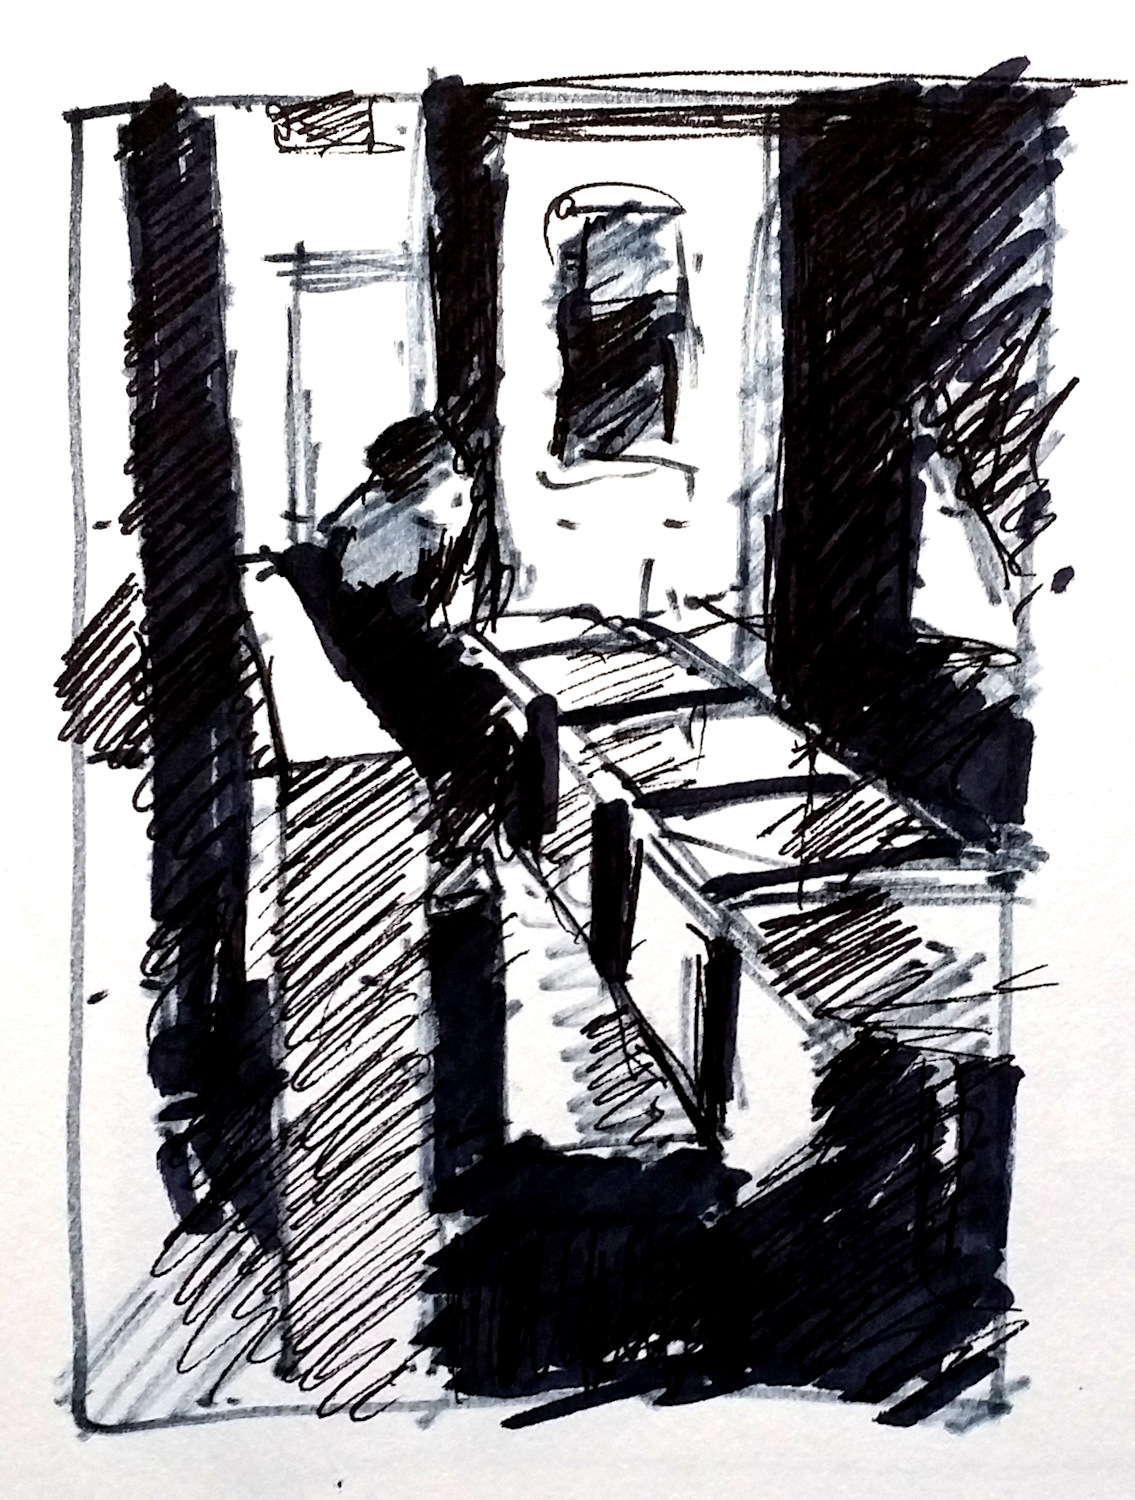
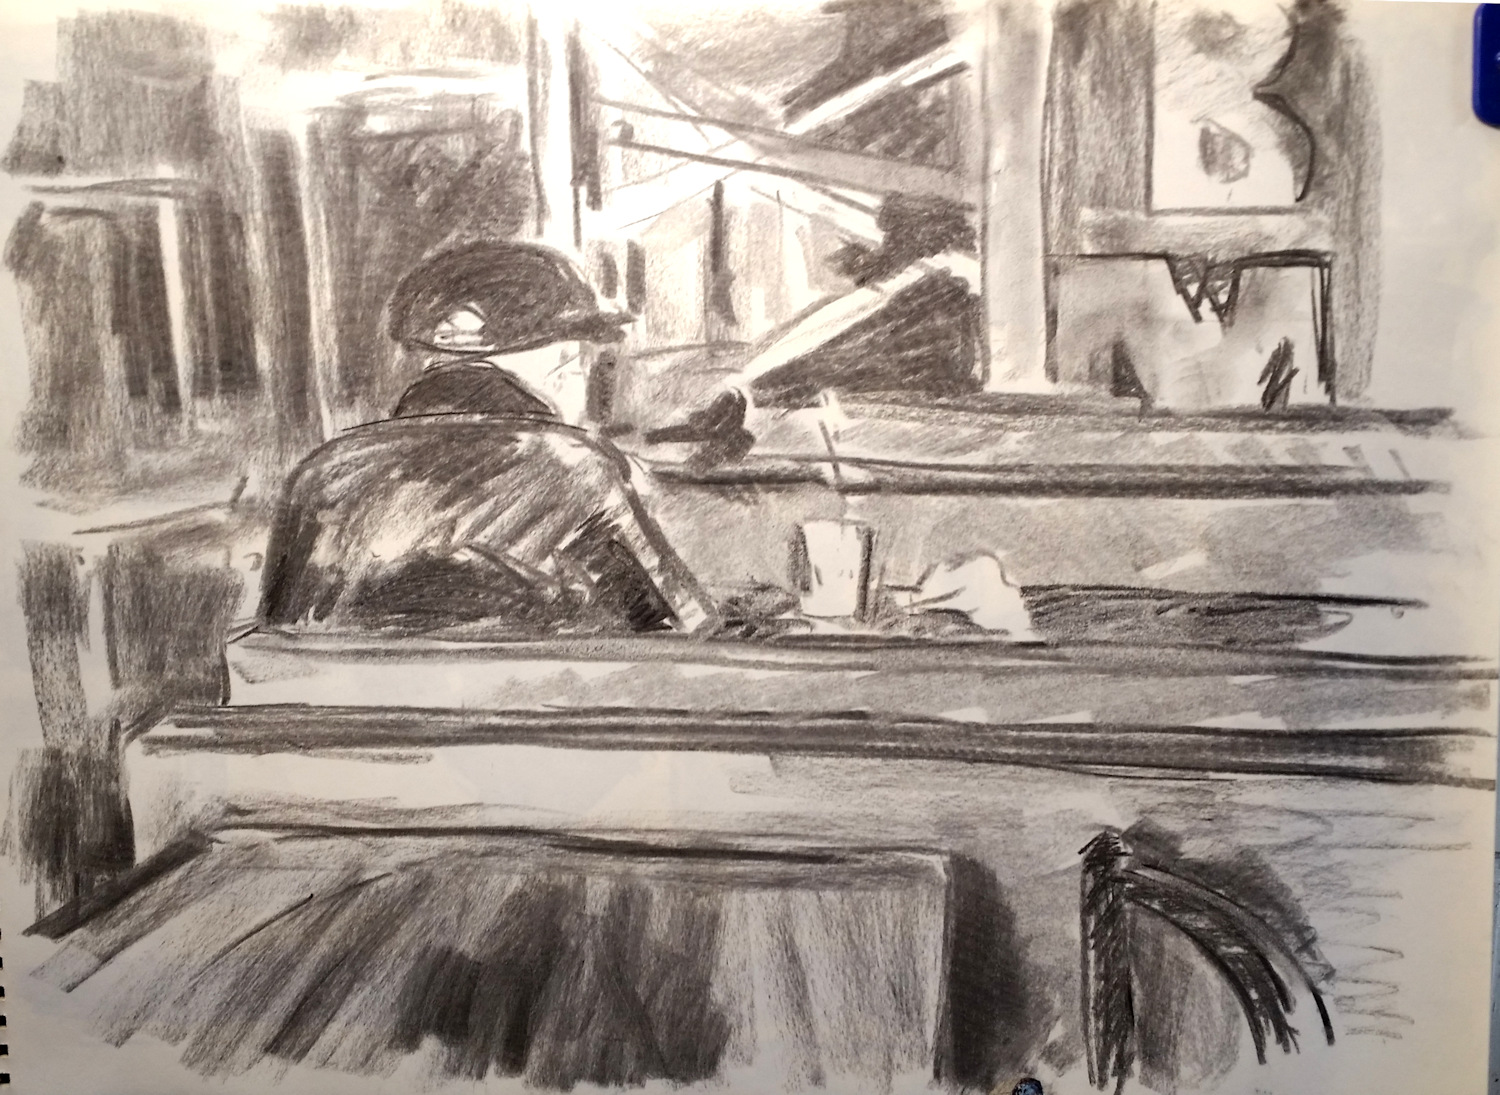
I’ve done sketches leaning against a building in Times Square late at night, on the edge of the Grand Canyon, along beaches, in the woods.  One time I was even next to a railroad track when a train hammered through.  A little exciting, for sure.

Using the lift gate as an improvised shelter during a drizzle.

When should I paint?

That is a personal preference but I like early morning or late afternoon because of the dramatic shadows.  But if you only have a little time, then take what you have and find somewhere.  There will never be a perfect place.  But you will make it perfect by selecting the composition.

Weather can be a factor.  I have painted in the rain either under the gate of my car or under an overhanging porch.  If it’s windy, you definitely want to anchor your easel with some bungees and your backpack.  If you’re painting in the snow, take some hand-warmers, scarves, and a hot beverage.  You can even paint in your car and make your steering wheel into a prop for your work.

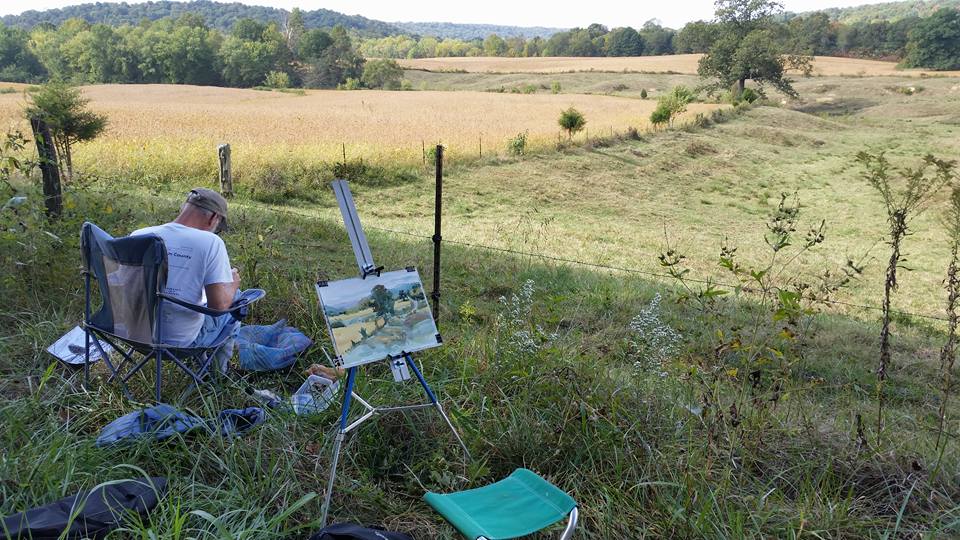
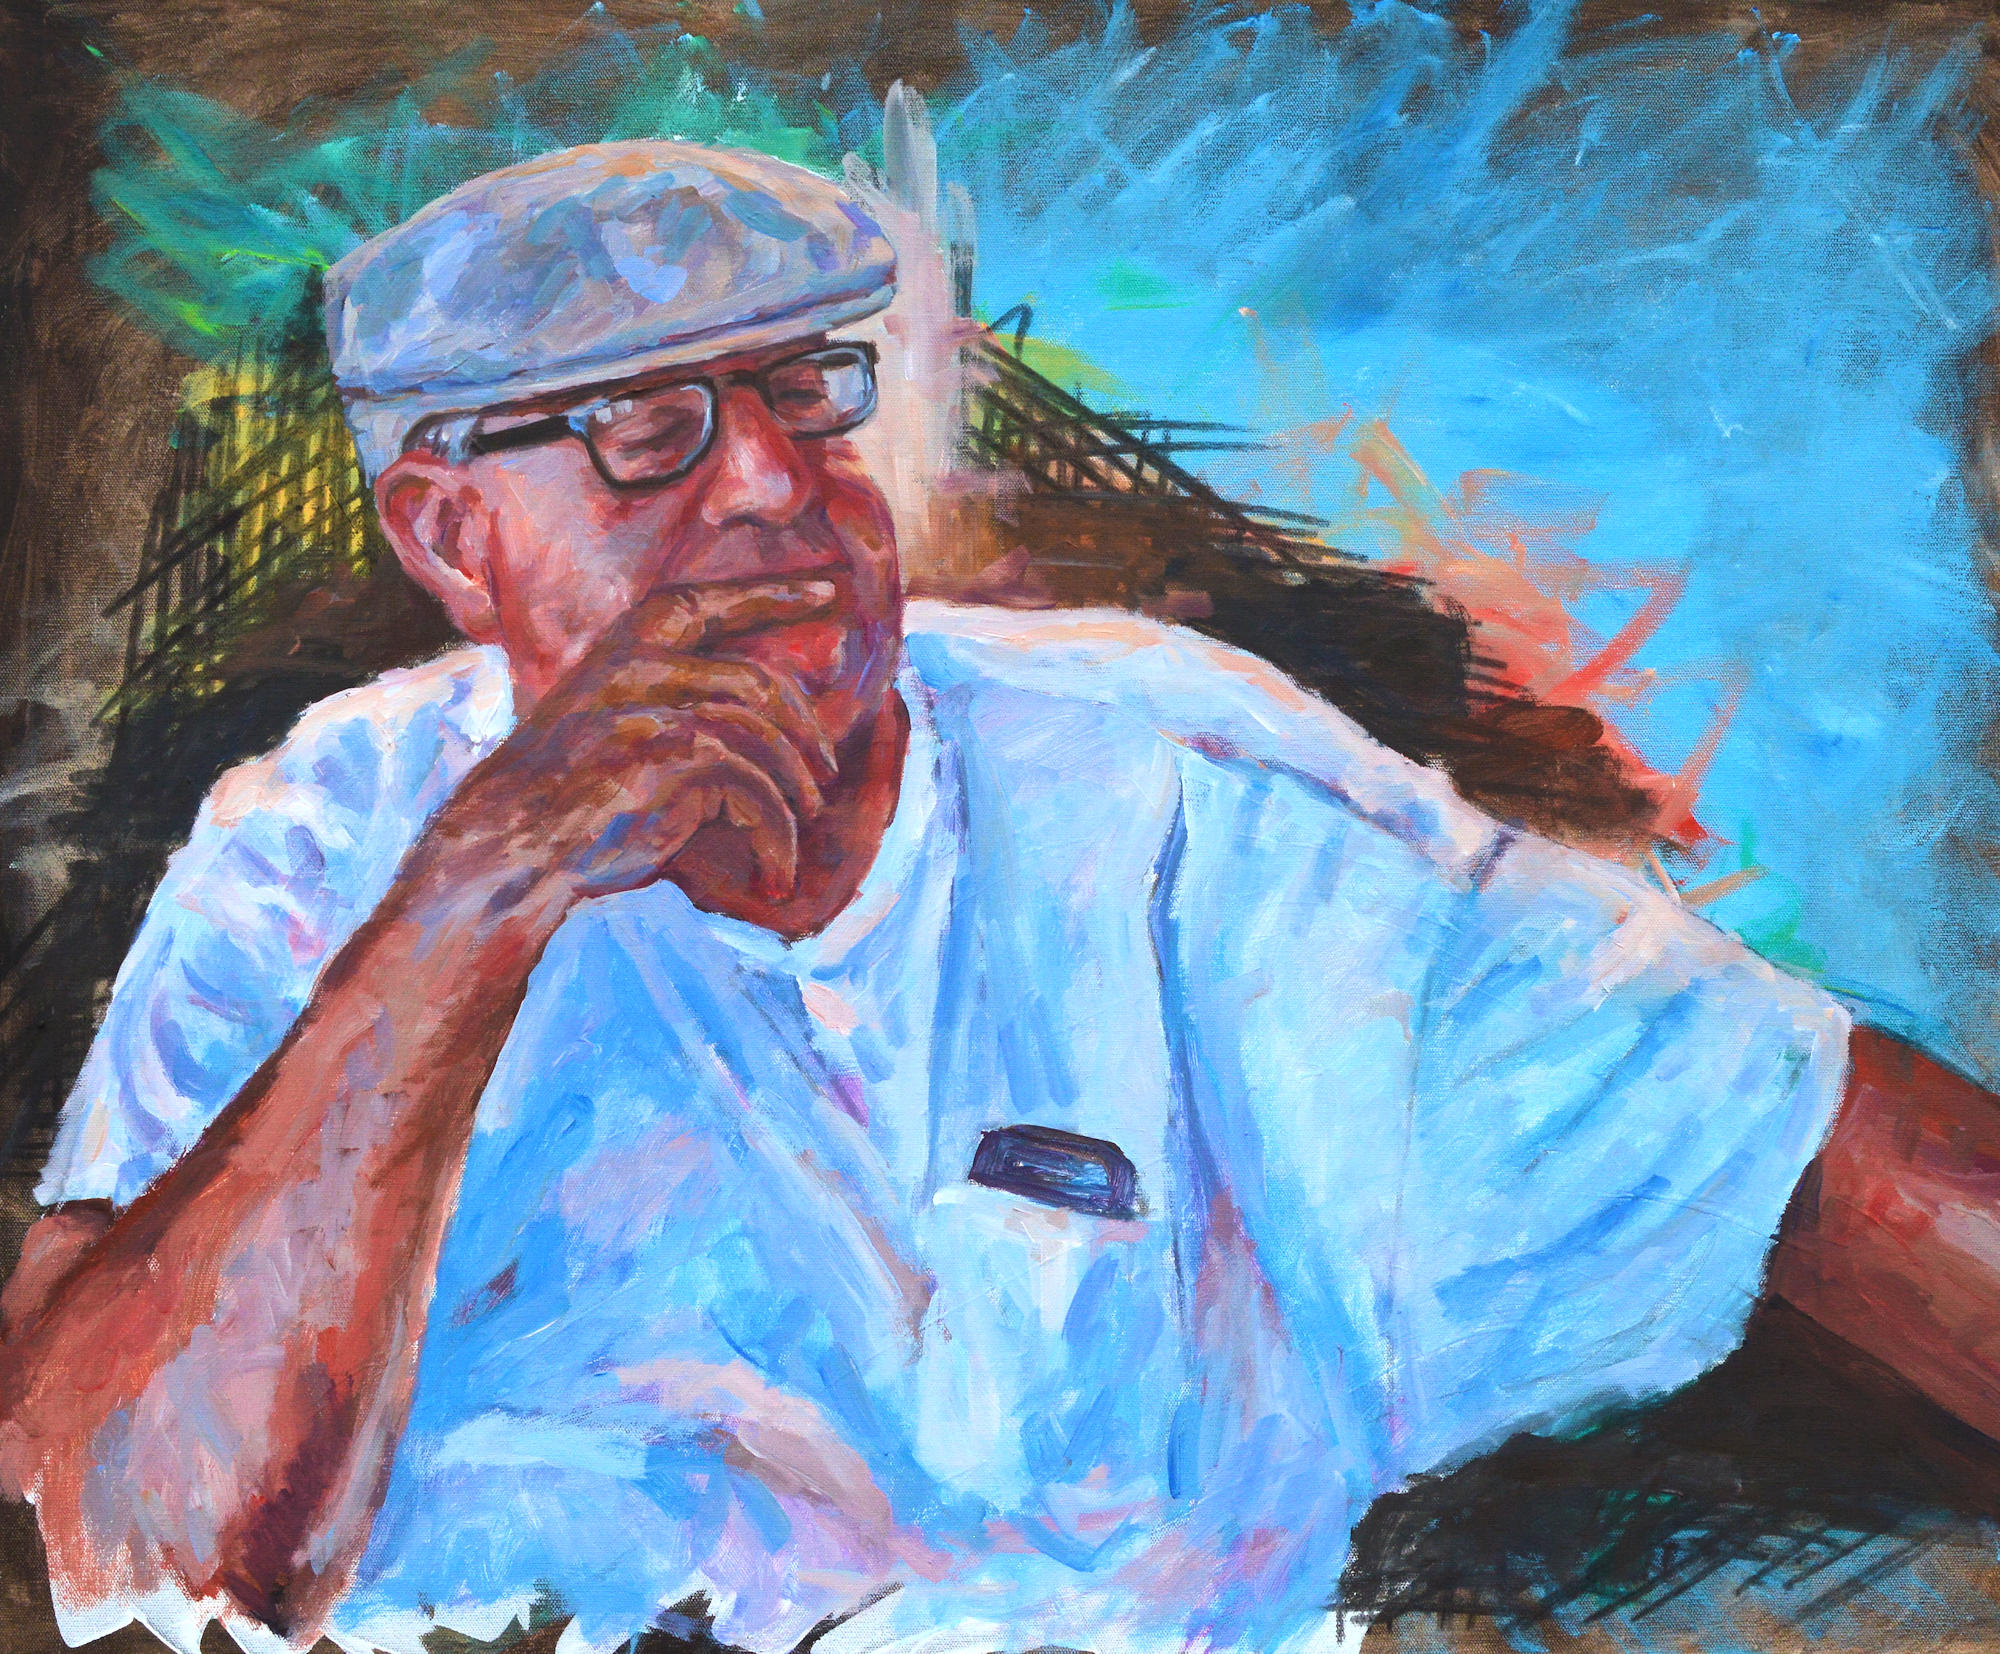
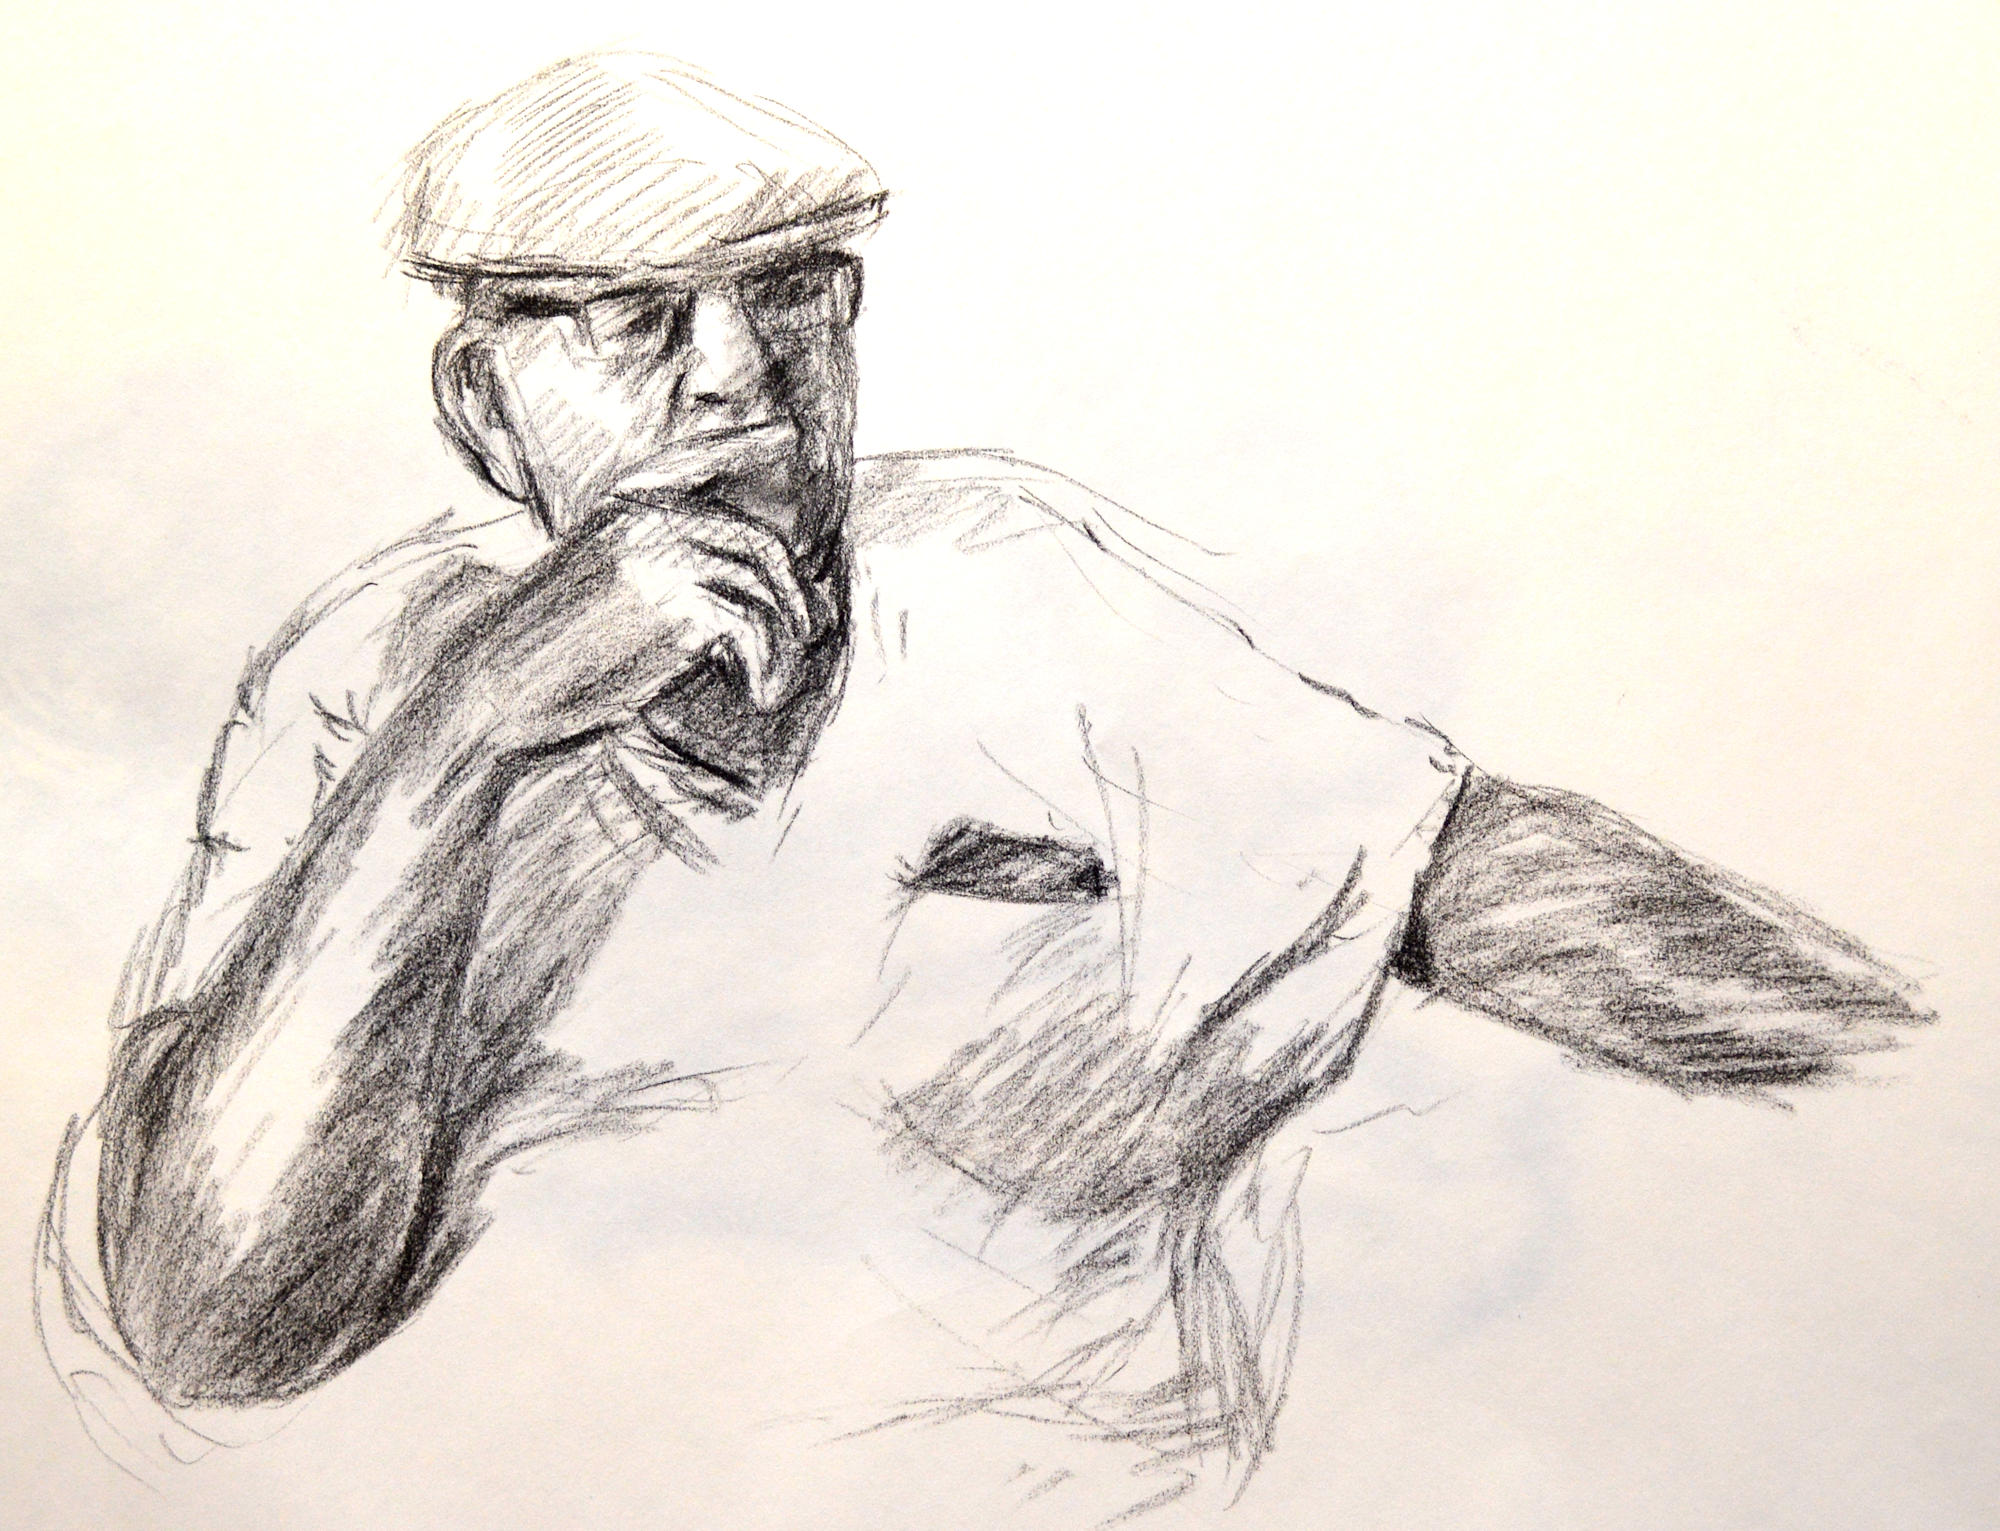
Painting with my friend Bill Whorrall. It’s interesting how two artists can paint the same subject at the same time but come up with totally different paintings.

Is it better to paint alone or with a group?

This is really personal preference.  I mostly paint alone more for my convenience than anything. But I know two ladies who have been painting together weekly for over forty years!  Some people enjoy the camaraderie of painting with a group or the excitement of a timed contest.  I just like to set my own pace without worrying about another person.  Except for my husband who enjoys fishing so we both get to do what we want together.

There is also the safety issue.  Being aware of your surroundings is always good, whether from beast or human or falling off a cliff.  Don’t do that! I’ve had both good and bad encounters with dogs.  One old guy just lay under my easel for the entire time I was painting.  A couple of others followed my bicycle looking at my leg like a steak.  Hot pepper spray has its uses.

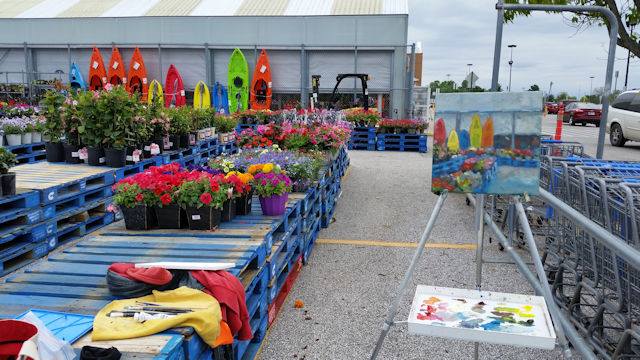
The Saturday before Mother’s Day found me in the gardening department. The staff never bothered me but I did have someone come up and ask if I could help them. I was wearing my paint apron so they thought I worked there.

I’m embarrassed to have other people watch me while I work.  What do I do about gawkers?

People are naturally curious, especially about seeing an artist in the wild.  Most are very polite and won’t even interrupt you but just watch for a bit and move on.  I often use a set of earphones (listening to music or not).  Sometimes I’ll only unplug one ear as I answer their questions, then (while still holding the earpiece) kind of turn around.  They get the message and move on.  Other times, take the opportunity to talk with your audience.  Ask about the scene and what they know of the area.  Educate them on what you’re doing.  Maybe you’ll even sell your painting if the scene holds special meaning for them. Frankly, you’ll quickly become comfortable working in front of people.  Believe me.  Really!

Make lists.

I have lists made for each of the type of medium I plan to use for the day.  Although my bags are packed, invariably I will forget something if I don’t look at the list.  Do I have water for painting acrylic or watercolor …and a container.  One time I forgot my palette.  I improvised by using an extra canvas that I had with me.  Lists are just a nice way to relieve your brain from the last minute frantic packing and getting ready.  I’ll share my lists with you in my next post.

This is a long post but I hope it encourages you to get outdoors and do some artwork.

NOTAN studies

Like nearly everyone else, my mind has been distracted with the current state of affairs in our nation, indeed, in our world. But I’ve cut back listening to the endless stream of news broadcasts which has helped bring some peace to my mental world.  This has allowed me to get back to my next series of paintings.  The theme of the series, which I planned out late last year, is Breaking Bread.  A bit ironic since we can’t go out right now, and only share meals with our own families or pets.  In this case I searched through hundreds (thousands?) of my photos from the past decade or more.

Italian Eating Italian. Charcoal sketch 18 x 24. Kit Miracle Again, the strong lighting is emphasized based on the NOTAN study but some middle tones have been included.

Italian Eating Italian, NOTAN study. As you can see, I’m playing around with the size and shape of the composition, square or rectangle?

The photos are taken in color but to distill them to their essence, I convert them to black and white, and then push the contrast of the black and white.  You can do this in person by squinting at your subject or using the red gel trick that I have discussed before.  I usually make quick NOTAN sketches when I’m out doing some plein air painting.

Alone, NOTAN study. Although I don’t usually add middle tones to the NOTAN study, I did here to add more body to the image.

Alone. Charcoal sketch 24 x 18, Kit Miracle. Here I have added middle tones but it still keeps true to the basic NOTAN study.

The whole idea of the NOTAN sketch is to find the best pattern for your subject.  Definitely not meant for every style of painting but very helpful to establish the overall effect.  As a rule, you will not want to have exactly the same amount of black and white areas in the NOTAN subject.  Also, look for pleasing patterns.  Don’t worry about details at this stage.  As you can see, the NOTAN subjects that I’ve created here are about 5 x 7 inches, made with a Flair pen and a black art marker.

Old Man, NOTAN studies. I did two studies of this subject. The top one is more detailed with three tones – white, black, and middle. The bottom image is a more traditional NOTAN study and is very abstract.

Old Man, charcoal, 18 x 24. I will probably simplify the background of this painting to match the NOTAN study. There’s a lot going on but I like the contrast of the horizontal and vertical shapes.

After I have created the NOTAN sketches, I then do a larger (18 x 24) charcoal sketch of the subject.  The NOTAN study helps keep me on track for the composition, but the charcoal sketch allows me to add some middle tones. Most of the NOTAN sketches only take about five minutes or less.  The charcoal sketches usually take 30 to 60 minutes.  I sometimes do more charcoal sketches of details or to try different compositions.

Late Night NOTAN. This is an example of extreme abstract shapes created by the NOTAN drawing. There’s a rhythm of ovals and rectangles within the picture plane.

Late Night, charcoal sketch 18 x 24. Kit Miracle. Although the oval shape in the foreground (back of a chair) captures the eye first, it is then directed to the group of teens in the right rear of the picture plane. The dark window provides a perfect foil for their shapes.

After these steps, I may do some color sketches but I always keep referring back to these black and white pieces when I’m working on the final painting.

Here are some links to previous postings about using NOTAN sketches for your work.

https://my90acres.com/artwork/wings-beach-painting-step-by-step/

https://my90acres.com/2019/02/17/little-stone-church-provence-demonstration-painting-from-photographs/

https://my90acres.com/2019/04/14/the-importance-of-preliminary-work/

Making temporary fixes to a painting

Far Horizons, original painting, acrylic on toned canvas, 20 x 24, Kit Miracle This is the original painting with portions of the toned canvas (raw sienna mostly) showing through as well as the original charcoal sketch on the canvas.

A few weeks ago I posted about changing the background of a painting.  I took a standard flower painting from a traditional dark background to a colorful reddish-orange background to a mixed background.  Someone asked me if I made the changes on the actual painting.  Yes, I did.  I like the painting but I’ve long passed the point of where every one is precious to me.  As the artiste, I feel it is my right to paint how I wish and what I wish.

However, I’m going to show you a neat little trick which will allow you to make temporary changes to a painting.  Here you can try out new ideas, new approaches without making permanent changes.

I have a large roll of acetate film which I used to use for wrapping large matted but not framed paintings, particularly watercolors.  This kept the paintings clean and protected them from fingerprint smudges and other dirt.  Great to use in art bins or wherever you want to display your work in public. You can buy acetate in rolls or sheets.

The painting that I’m demonstrating with is titled Far Horizons.  It shows my granddaughter looking out over the Grand Canyon. Not only does the painting depict the distant views of the Grand Canyon, but the deeper meaning of a young girl looking out to the future.

Although I love the composition of the painting, it somehow didn’t seem to give the impression of really far horizons, as anyone who has visited the great canyon can attest.  So I wanted to try to lighten the background as a test.

Far Horizons, 1st step. A clear acetate sheet has been taped over the canvas. No painting has been done on the acetate yet.

First, I cut a large piece of acetate and taped it to the painting.  Then just started loosely painting over the acetate with acrylic.  I lightened both the distant sky, and made many changes to the rocks with lighter colors.  I even added some more highlights to the girl’s hair and jacket.

Far Horizons, 2nd step. Here you see that I started with the sky and have been painting directly on the acetate sheet. The whole idea is to test out some lighter background colors in order to push it back.

Detail of step 2 showing some loose strokes of lighter colors.

Far Horizons, final step of the acetate painting over the original painting. I even touched up the highlights of the girl’s hair and jacket.

This is the actual painting on the acetate. I’ve put a plain piece of toned paper behind it to better show you the actual painting.

I plan to set the painting aside in order to evaluate whether I want to make any of these changes permanent.  If not, I haven’t done any damage to the original painting and can leave it just the way it is.

This technique works well for both acrylic and oil painting.

Painting in 3D

I recently had some work in an exhibit which was limited to works 8  by 8 inches.  That is pretty small.  So I decided to challenge myself by adding another twist.  I ordered three canvasses 8 x 8 by 2.5 depth.  It was almost like painting on boxes.

I’ve painted edges of canvasses before but this deep was extra challenging.

Kit Miracle – White Dahlia 3D, acrylic, 8 x 8

White Dahlia, left side

The first two paintings were of flowers, of course.  I paint a fair amount of flowers as you know.  Here it was fun to plan what part to focus on and which parts to wrap around with the painting.

Kit Miracle – Sunflowers 3D, acrylic, 8 x 8

Sunflowers 3D, left side. You can see where the flowers were carried around the edge of the deep canvas.

Sunflowers 3D, right side.

The final painting was really outside of my normal subject matter.  A goldfish bowl with a couple of fish swimming around.  I actually had great fun with it, especially carrying the fish bowl around the sides, top and bottom.

Kit Miracle, Goldfish Bowl 3D, acrylic on canvas, 8 x 8 I love the way the fish on the right is looking directly at you. Or so it seems.

Goldfish Bowl left side

Goldfish Bowl 3D, right side

Goldfish Bowl, top

Kit Miracle – Goldfish Bowl 3D – bottom

I guess some artists are more comfortable painting the same thing time after time, but I find that I like the challenge of trying something different.  What do you think?

Matting works on paper

Did you receive any artwork for the holidays and are a bit confused about how best to mat and frame them?  This post specifically addresses matting works on paper.  This includes watercolors, pastels, drawings, etc.

These are the simple matting tools that I use for fixing a painting to a mat. (Cutting a mat requires different and specialized mat cutting tools, not addressed here.)

The first point to remember is don’t do anything that could damage your artwork or that can’t be undone.  Do not use scotch tape or other such adhesive products as these can bleed into your art.

Works on paper are typically framed under glass to protect them from moisture, air pollution and other environmental conditions which could harm the art.  They are usually framed with a mat so they are not pressed right up against the glass.  Some exceptions are if the framer uses spacers to keep the artwork from touching the glass but I am not going to address that option today.

Mats can be purchased at art supply and craft stores and even online.  These will usually be standard sizes unless you cut your own or have the store cut one for you.  (This is one of the benefits of using standard sizes.  Check out this link to an earlier post.)  Since I use standard sizes for my smaller work, I purchase museum-grade mats  in volume from an online retailer.

The key with matting a work on paper is that it should only be hinged at the top of the artwork.  This will allow it to “float” in the frame.  Paper is sensitive to humidity and needs to be able to expand and contract.  If you stick it down on all sides, the art will buckle at times.  Certainly not the look you want, I’m sure.

A small painting with a ready-cut mat and backing. The painting has a border around it to allow some flexibility in situating it within the mat.

Small work hinged. I have hinged it all the way across the top.

In this small snowman painting, you can see that I’ve hinged the mat all the way across at the top.  I use my thumbnail to press down on the framer’s tape.  To remove the tape, apply a little heat from a hair dryer.

Snowman, final matting

The second example is a larger painting with an individually cut mat.  Here I have created hinges with vertical strips, then horizontal strips holding the vertical strips.  To help keep the artwork in place while I’m working on it, I use a couple of pieces of removable painter’s tape.  Remember to remove it after you place the hinges.

Matting a larger work. Here you see the border I have left which allows me to situate the painting behind the mat before I begin to work on it.

Use some removable painter’s tape at the bottom to hold the painting in place while you work on the hinges at the top. Remember to remove this tape after you are finished with the hinges.

Large work with first set of vertical hinges.

Large work, second set of hinges. The horizontal hinges hold the vertical hinges in place but do not actually go on the painting.

You can buy framer’s tape at most art supply websites or framer’s stores.  A roll is relatively inexpensive and will last for years.

Large work completed mat. Remember, it is only hinged at the top of the painting which will allow the painting to “float” in the mat.

Mulberry paper is very fibrous and strong. It makes a good alternative to tape for making hinges. However, you will need a separate type of adhesive, usually something like Elmer’s school paste.

A final way to hinge your painting to a mat is to use mulberry paper.  As you can see, this paper is very fibrous and strong.  Just cut hinges in the shape and size as the tape demonstration above.  I used this method extensively at the beginning of my art career.  With larger paintings, such as full size watercolor paintings, you may need to use four or five sets of hinges across.  Then use Elmer’s paste to adhere the hinges to both the artwork and the mat.  Remember, do no harm and be able to undo your actions if you need to.

I hope this helps you to get your new artwork up on the wall. Please don’t hesitate to contact me with any questions.

Useful links:

Jerry’s Artarama framing tapes

Dick Blick framing tape

What a difference a background makes

Lilies with brown background. Acrylic on canvas, 16 x 20. Kit Miracle

I often treat myself to a bouquet of fresh flowers when I’m at the grocery.  They just make me feel good and remind me that spring will be here soon (another three months).  This week’s selection included some beautiful lilies and other flowers.  Of course, everything becomes a subject for painting to an artist.

I started this painting yesterday and worked on it some more today.  Although the first image with the dark background is pretty classic, it was nice but didn’t move me.

Lilies with orange background. Acrylic on canvas, 16 x 20. Kit Miracle (Apologies for the glare from my easel light.)

So…..I decided to try some different backgrounds.  First I painted a bright, orangey-red background. This really added some pop to the painting.  But it seemed very flat to me which is probably what I didn’t like about the first painting background.

Lilies with blue and orange background. Acrylic on canvas, 16 x 20. Kit Miracle

Then I added some variegated shades of blue to the background, leaving the orange at the bottom. Much better and it ties in with the blue vase.  (I have many cobalt blue vases of various shapes and sizes which I’ve collected over the years.  This is why you see them in so many paintings.)

The flowers are essentially the same although I may have touched them up here and there. So, which background do you like best?  Dark brown, orangey-red, or blue and orange?  They each bring something different to the painting.

Hummmm….I wonder what a lime yellow-green would look like?

Evolution of a painting

Barry, portrait in acrylic on linen, 28 x 34. Kit Miracle

Except for plein air painting and sketching, it’s pretty rare that I create a painting by just diving in and slapping some paint on canvas.  Yes, I know, movies and biopics of artists give that impression.  But really, it’s hard work and, for me at least, requires a lot of preliminary work.

When I’m doing a portrait, which is to me the most difficult to achieve, I always begin with some preliminary sketches.  Generally I begin with some charcoal sketches.  Sometimes one is enough but more often it’s several.

Barry, preliminary charcoal sketch. Kit Miracle

After that, I may try some color sketches on canvas paper or panels.

In this case, I had recently been gifted with some art supplies by a friend who was moving so I proceeded to a conte crayon study on pastel paper.

Barry, conte crayon. on pastel paper.

The next step was to do a larger oil stick pastel, also on pastel paper.

Barry, oil stick pastel on pastel paper. Kit Miracle

The final painting was created on a large stretched linen canvas 28 x 34.  I had already primed it some time ago with a dark neutral background and some splashes of color in the center.

I sketched in the main figure with charcoal.  Then, sanded the primary area and gessoed it again.  Then sketched over that again with charcoal.  A little spray fixative set the charcoal so the painting process would not pick it up.  I decided to leave the background unfinished with just the initial undercoats of paint.

The figure is painted in acrylic very loosely but with attention to detail in the face and hand.  The primary difference with painting a human portrait as opposed to painting a building or landscape is that if you’re off a brick or leaf in the landscape, no one will know. But if you’re off a quarter of an inch on a nose, you have totally missed the mark in capturing a portrait.   At least in my opinion.

What do you think?

More paintings from the Snake River

Snake River, Idaho, II, watercolor, pen and ink, Kit Miracle

Tomorrow (Veteran’s Day) is the final day of my landscape painting class.  We have been using watercolor with pen and ink added for details.  It’s been a great class but a little challenging for me.  I usually like to include something man-made in a landscape painting to give it that human touch, as well as to provide scale.

Most of the paintings we’ve done this class have been pure landscapes without any notion of a human in sight.

Tomorrow’s painting will involve a subject with a water feature.  Looking through some of my thousand of photographs, I decided to add a water feature since this is pretty common to landscape paintings.

Here are two simple compositions of the Snake River in the southeast area of Idaho.  The paintings are created with about five or six colors, but certainly less than eight.

Palisades Reservoir, Snake River, Idaho. Watercolor, pen and ink, Kit Miracle

One shows the reservoir lake as the viewer is looking into the sun. The other shows the Snake River with the sun at the back of the artist.  Both are relatively simple landscapes but should be challenging for a class of beginners to try.