
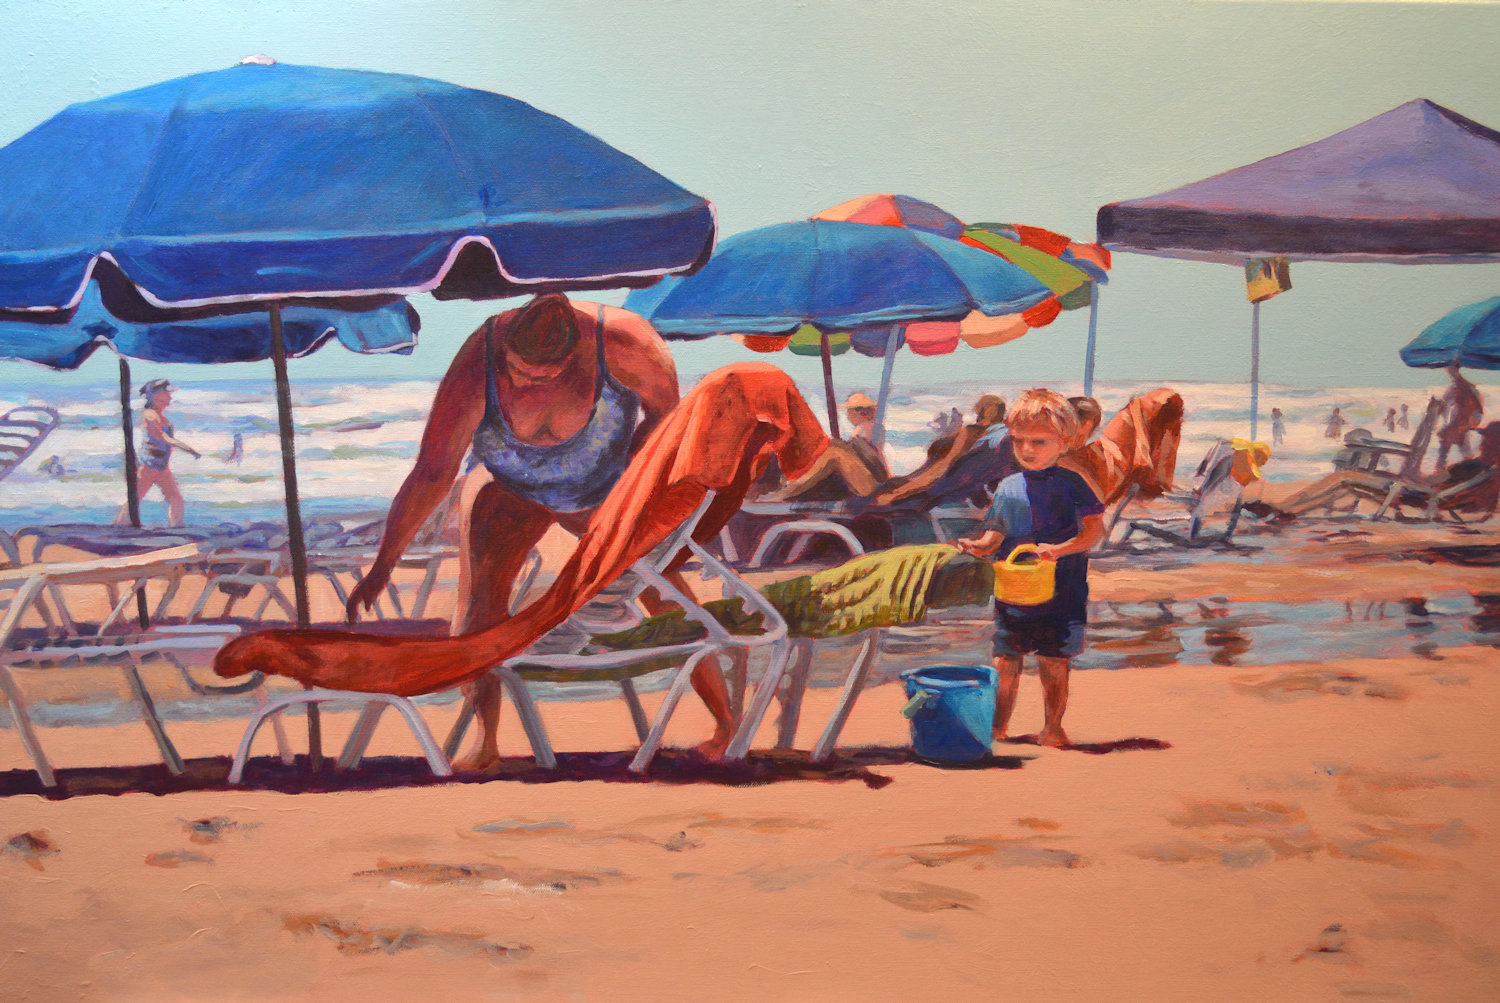
A Day at the Beach, final. 24 x 36, acrylic on canvas, Kit Miracle
This is number six in a series of beach paintings. To learn more about the series click here or check out my blog post for April 10, 2019.
This slice of life depicts a mom staking out her territory at the beach. Setting up the lounge chairs while her son waits patiently to go play in the sea. The main action is focused on the middle part of the painting with the overlapping umbrellas and tents. I have deliberately simplified the sky and the foreground to direct focus to the main part of the painting.
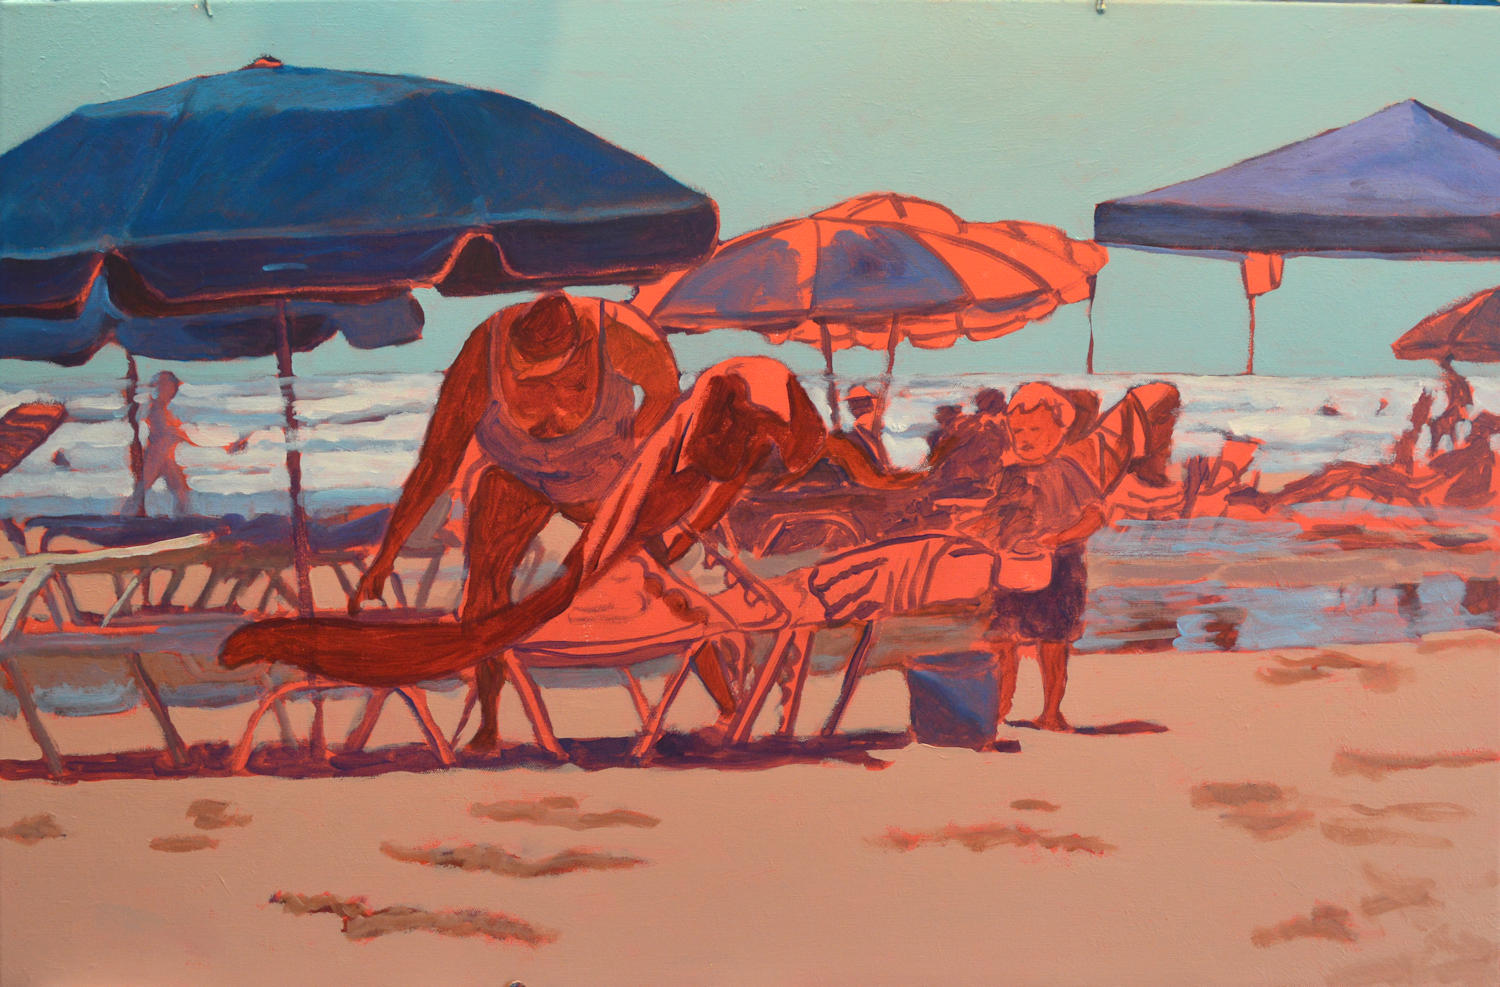
Step 1. After doing a number of sketches, I selected a canvas 24 x 36, and primed it with an orange/red color. Then I sketched the scene on the canvas with a dark neutral color.
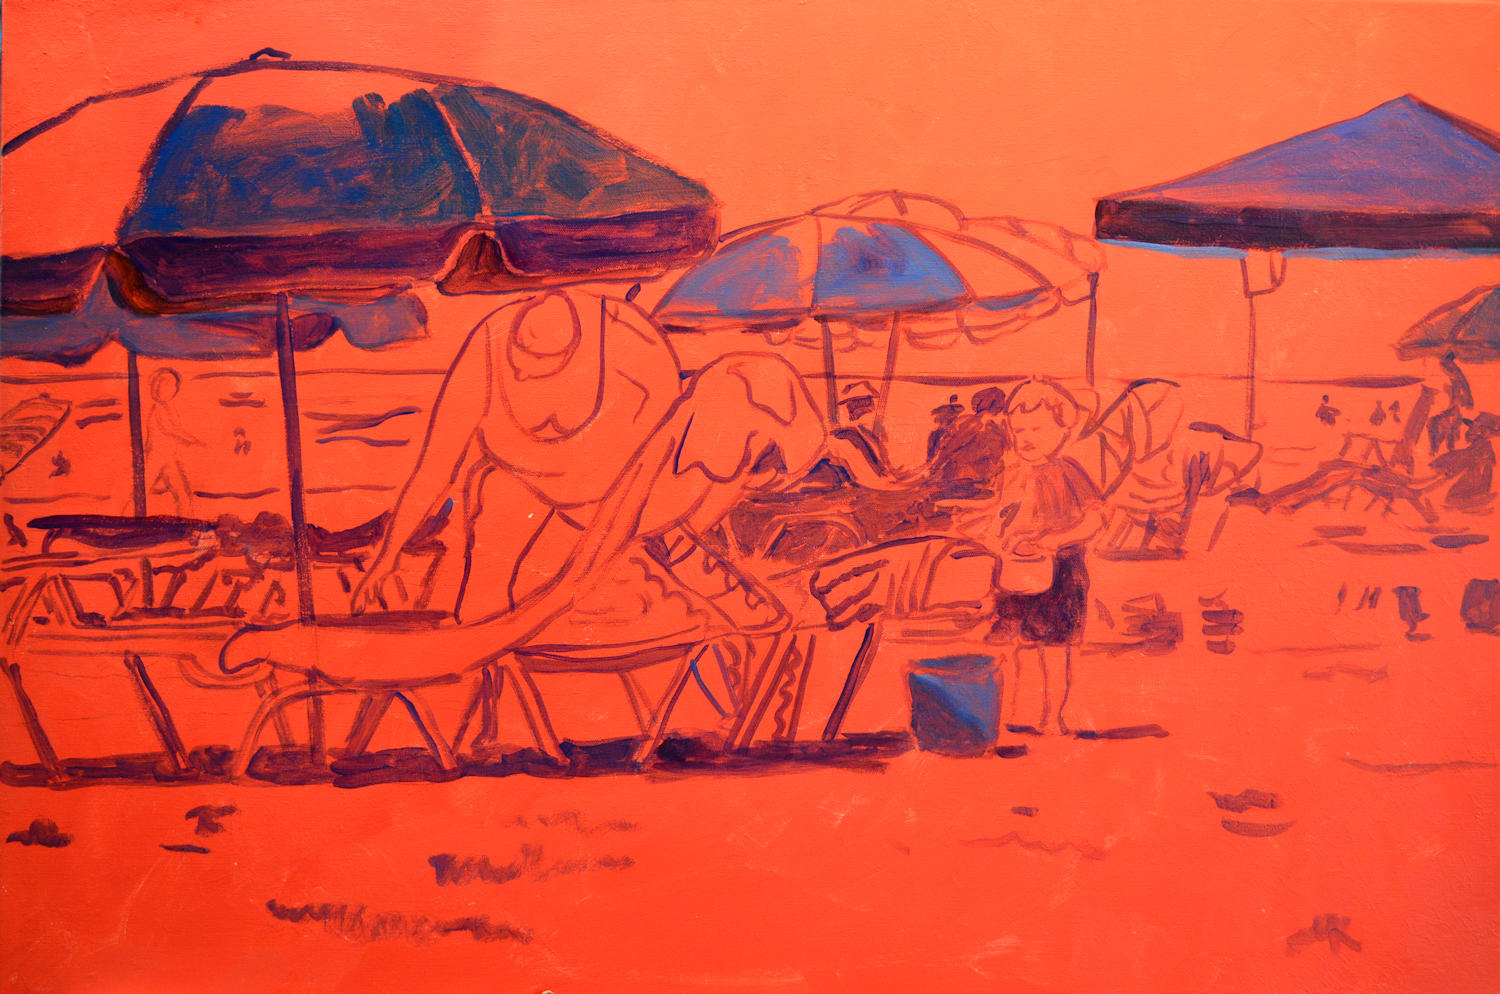
A Day at the Beach, step 1. Painted on orange-gessoed canvas.
Step 2. I painted in the sky and some of the background sea. Usually I begin with the largest areas, like sky or background, top to bottom.
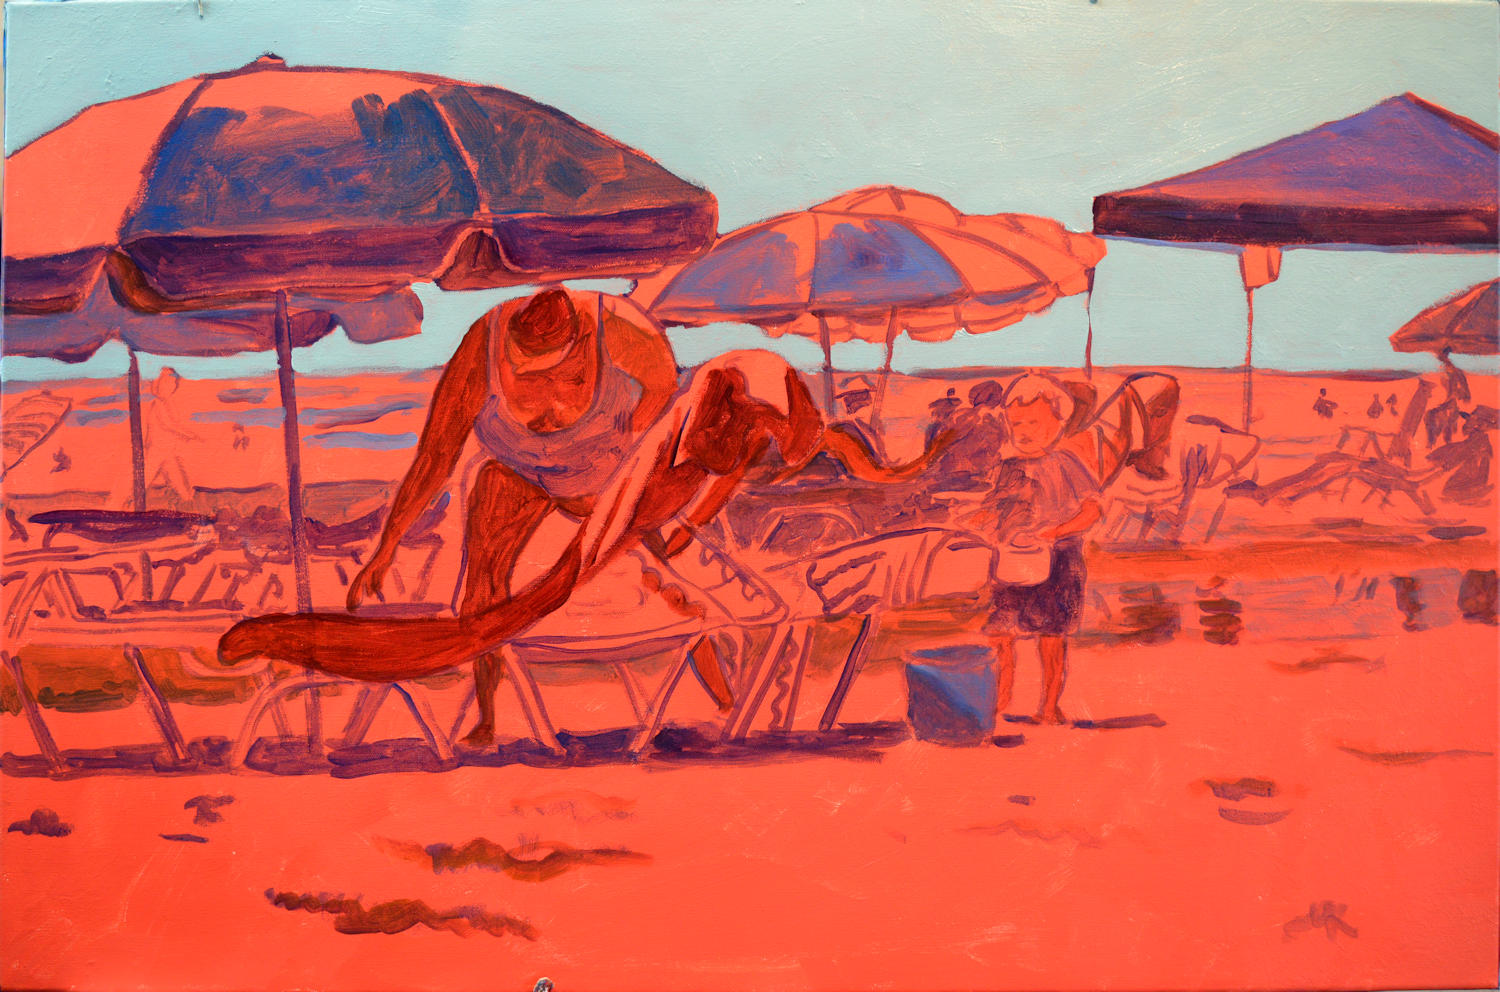
A Day at the Beach, step 2. Adding sky and blocking in shadows.
A Day at the Beach, step 3. Adding foreground and indications of reflections in water.
Step 3. Here you can see I’ve added much of the sea and the foreground.
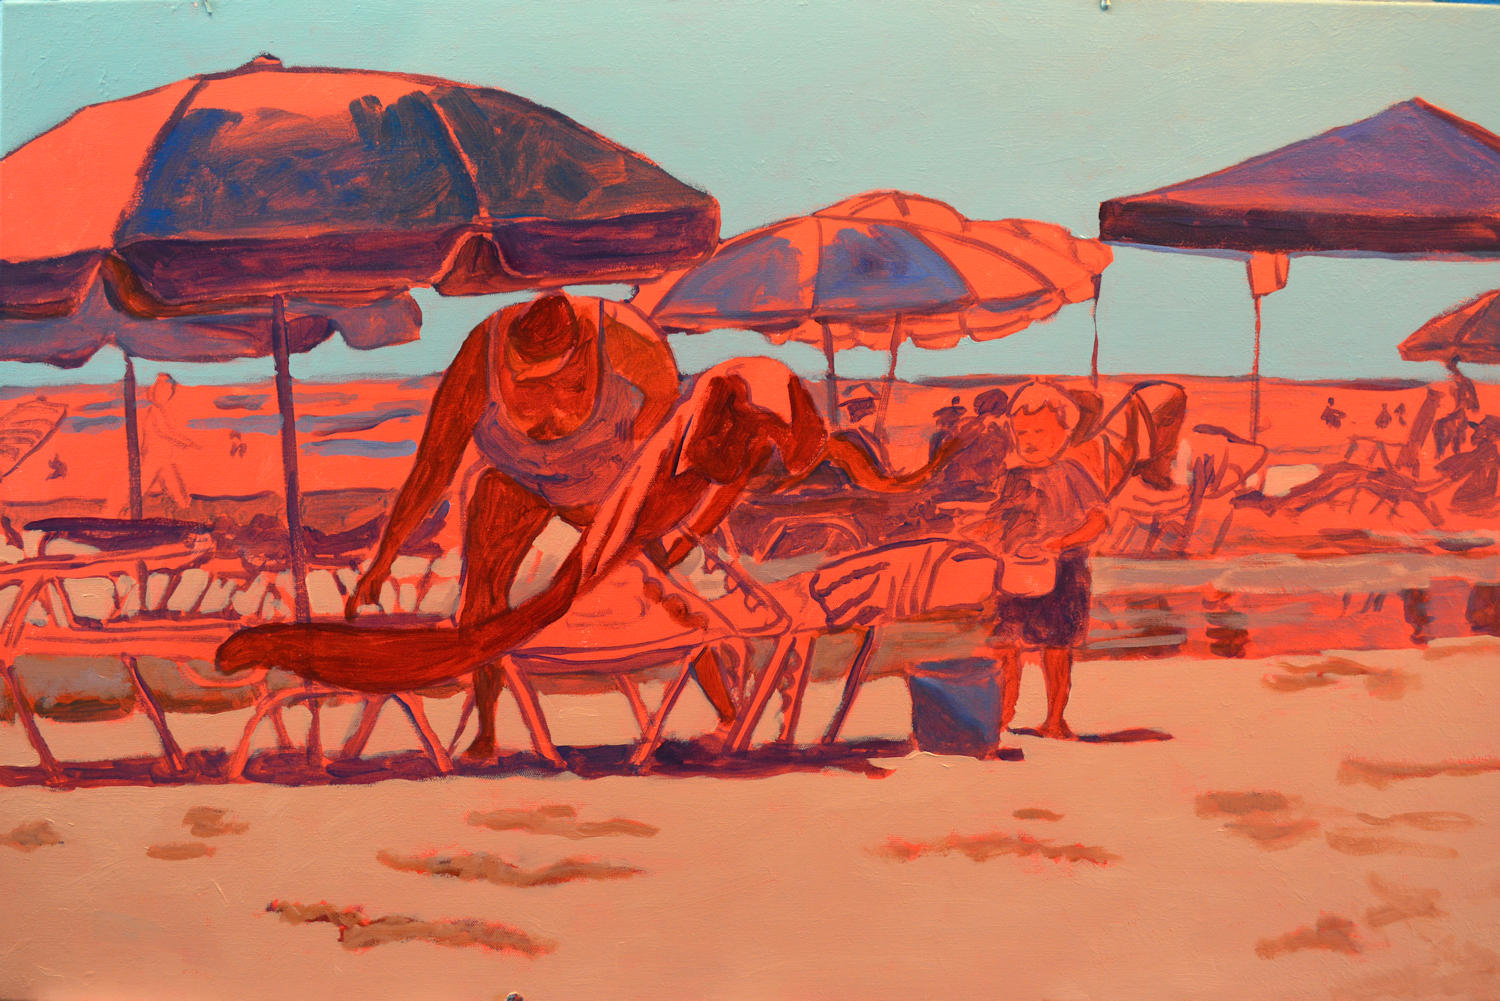
A Day at the Beach, step 4. Most of the sea is completed and adding more details to background and chairs.
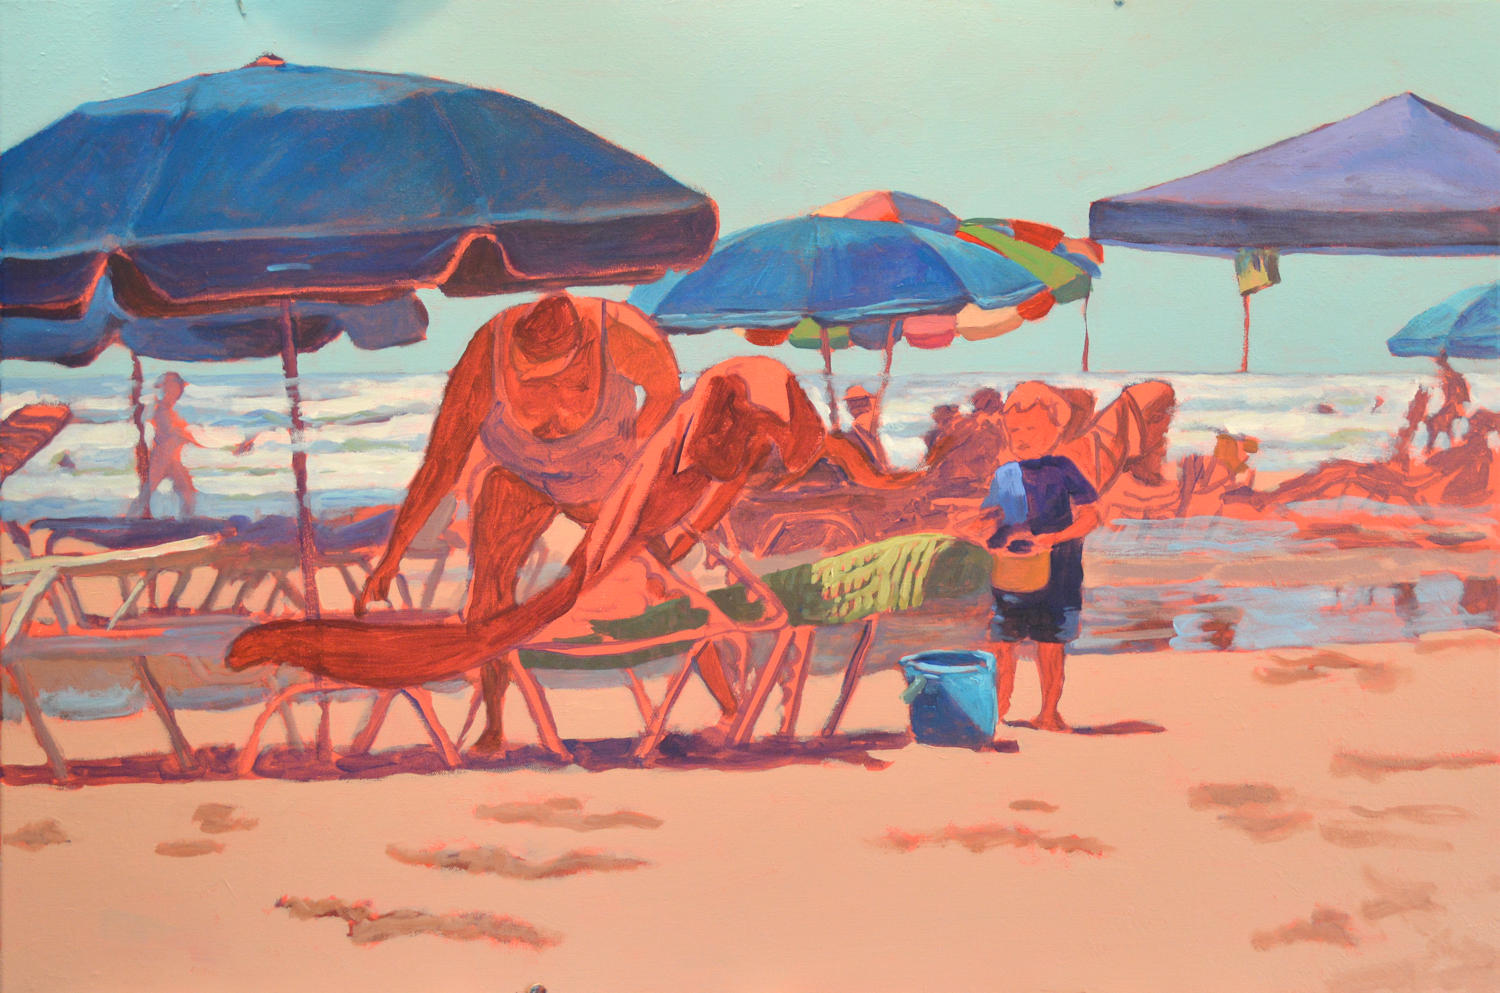
A Day at the Beach, step 5. Now it’s just a matter of adding color, details, and….a week’s worth of painting.
Step 4. Then it’s a matter of adding color and attending to details.

A Day at the Beach, detail 1. By having brighter colors up front, and dulling down the colors in the background, this pushes the back…back.
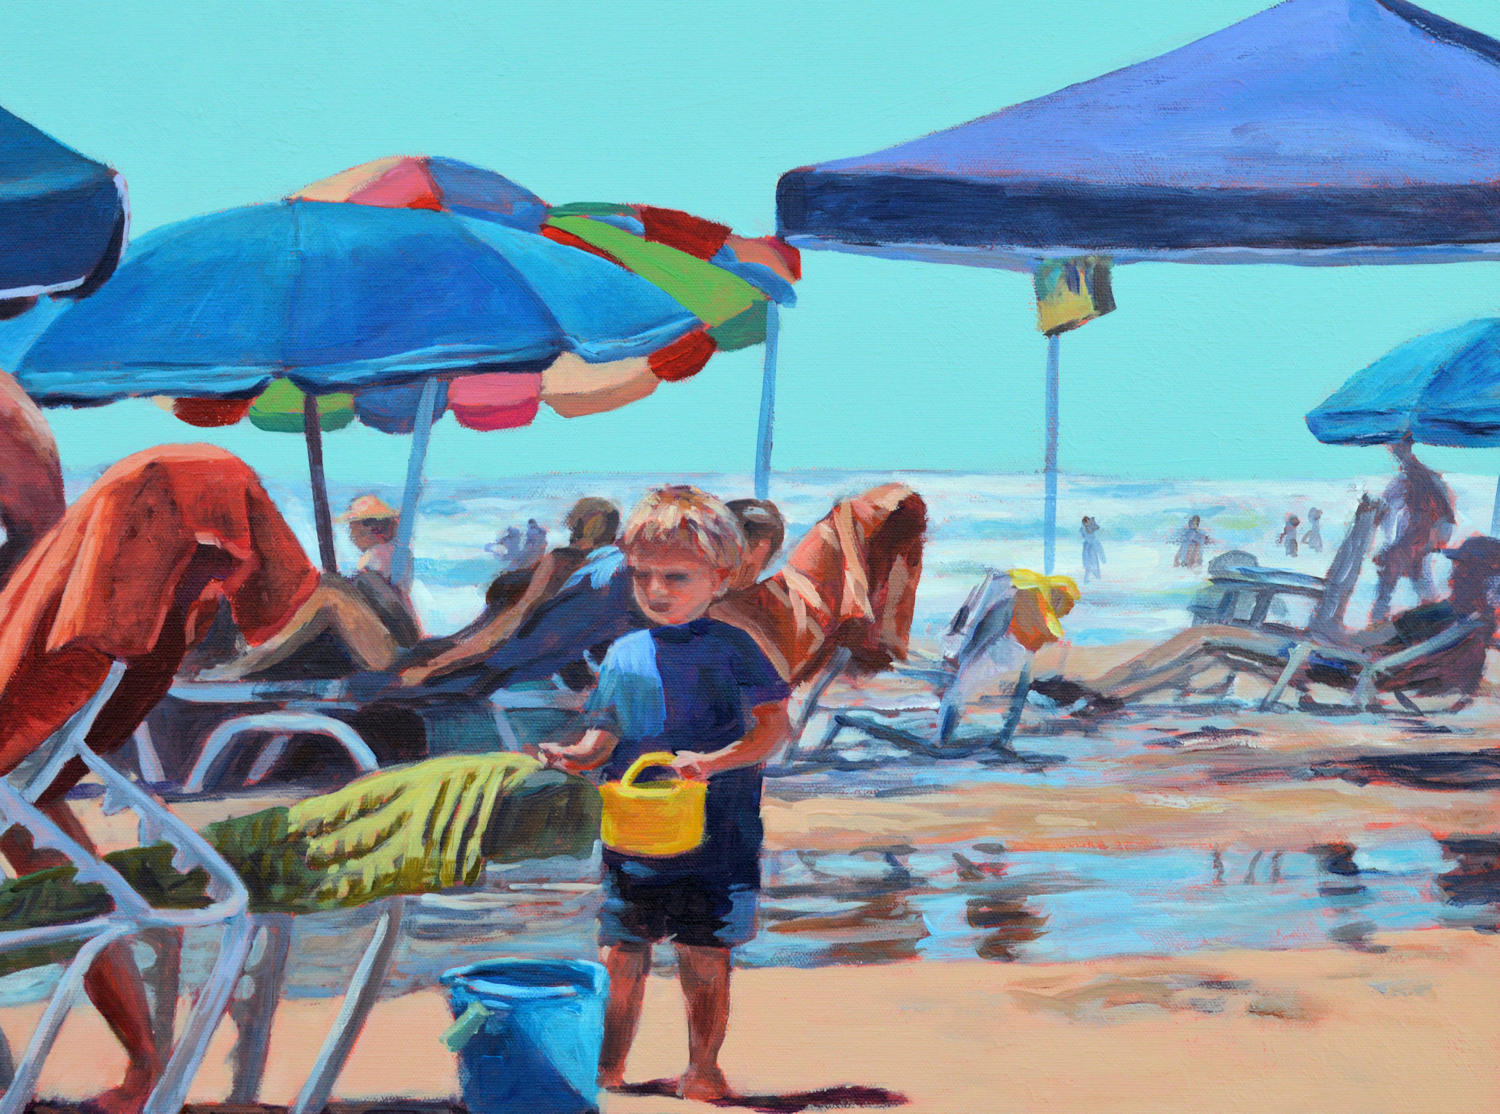
A Day at the Beach, detail 2. More color up front, more muted colors in the background. It’s all an optical illusion.
