
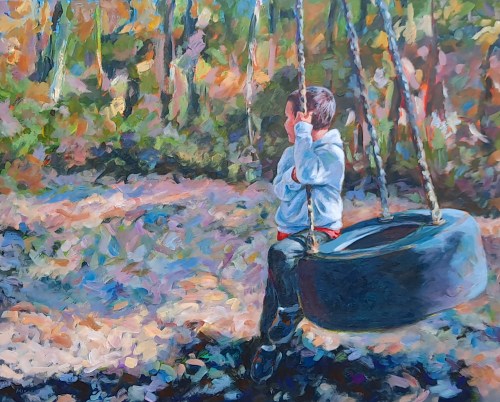
This is a pretty accurate step-by-step demonstration of my Tire Swing painting in the Park Series.
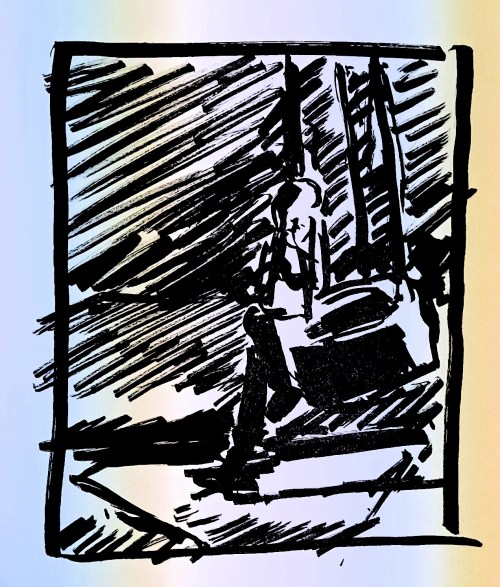
The first thing I do when I’m planning a painting is a NOTAN sketch. This is an extreme black and white sketch which eliminates most middle tones. I actually use some middle tones but essentially, it breaks down the painting composition into extremes.
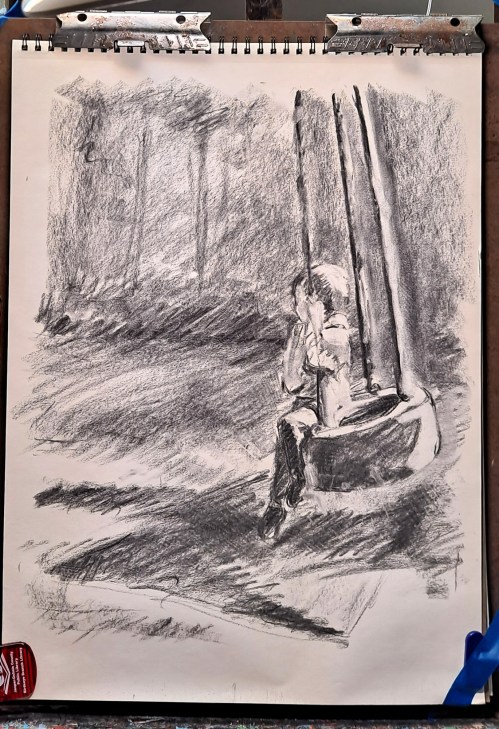
Next I draw a large charcoal drawing of the composition. This is where I move things around, pay attention to what I’ll emphasize and what I’ll deemphasize. In this case, I changed my mind from doing a vertical composition to painting a horizontal composition. The main subject is off-center but balanced.
After I decide on the size of the canvas, I put a textured ground coat on it, let it dry, then a coat or two of color. Sometimes I’ll use a more neutral undercoat, but here I’ve added a very colorful base coat. Most of this will be covered by the actual painting, but a few bits will peek through adding a bit of verve.
I then make a very basic sketch on the toned canvas with multiple bright colors. There is no plan to the colors that I use but I add them randomly. Again, they are mostly covered by later layers of paint, showing through in bits and pieces.
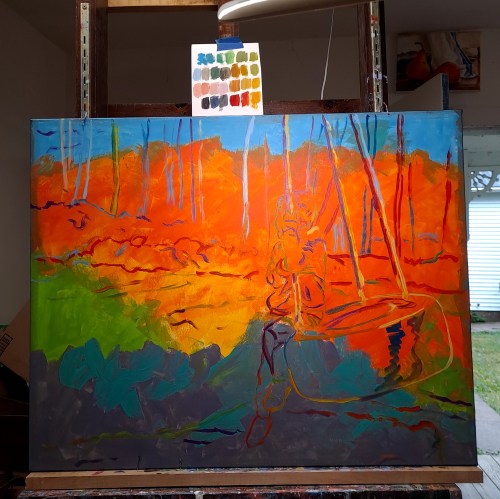
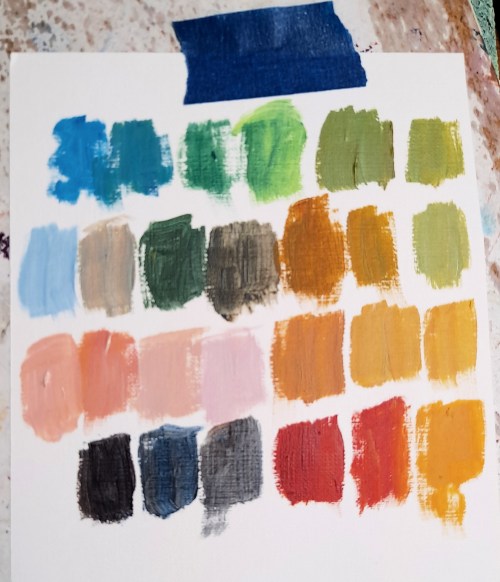
After that, I begin painting the scene with broad strokes in my contemporary impressionist style. I usually do the background, starting from top to bottom, and/or the darkest parts first. Then it’s just a matter of zoning out, adding multiple layers. The lightest colors are reserved for last. The best part about using acrylic paint is that it dries quickly. I can often add another round of paint in about fifteen minutes. I refer to my color swatch sheet to try to keep everything in the same family.
If you look closely at my color swatches, I don’t use any commercial greens or blacks. I have several shades of blues and yellows on my palette but I find that I can mix more interesting shades of greens myself. I limit myself to one or two shades of blue in any one painting. Speed is essential for this stage of the painting.
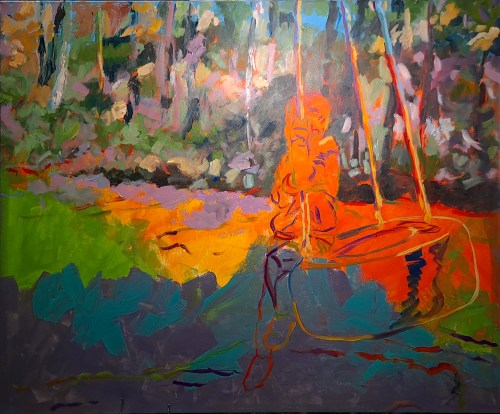
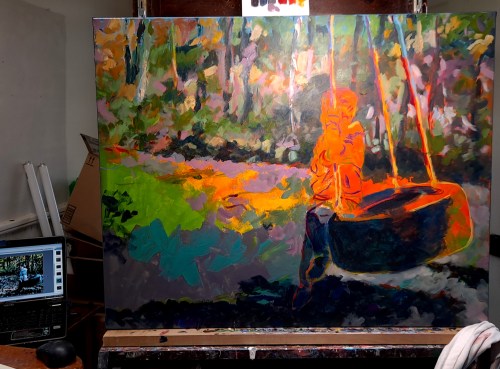
By the time I get about 80% of the painting done, then I’m ready to start honing in on the details. This means switching to smaller brushes, stopping and starting a lot, frequently stepping back to view my results. One of the biggest dangers in this stage is if some area of the painting is “too precious.” This means that I love what I’ve done with a particular stroke, color, area…..but it doesn’t necessarily fit with the overall direction of the painting. It is sometimes very difficult to paint over some area that I really love, but I’m seeking the overall effect of the painting, not just a few random pieces. This is where I’ll often take a break and come back another day to look at the painting again. I can often spot major flaws when I give it a rest and come back later.
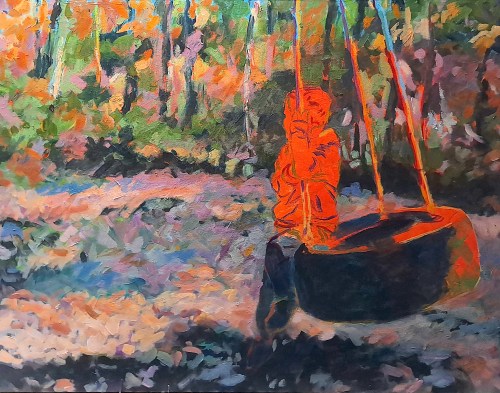
The final few details take the greatest time. What to include and what to leave out? Oh, look, I forgot the nose! This is where taking a break from your work helps the most.
