Tag Archives: framing

Preparing for the big exhibit

Intimate Spaces: Breaking Bread series. Hung on the side of my studio. It sure helps to have all the canvases the same size. At least for ease of framing and wiring.

The good news is that we were able to escape to warmer climates for a brief respite.  After two years of being stuck at home, we had a delightful and restful vacation.

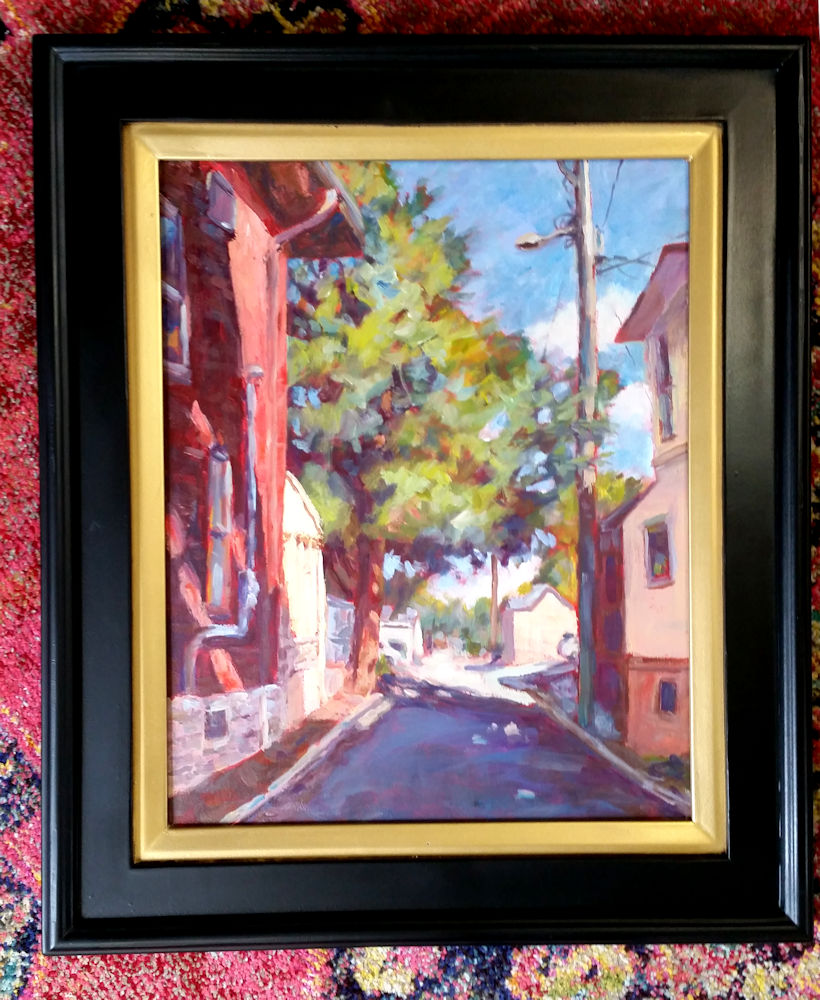
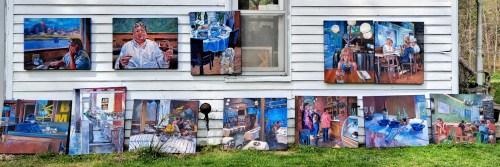
However, upon returning, I had to start scrambling to prepare for my upcoming solo exhibit in May/June.  Fortunately, all the paintings are completed.  The frames were on hand.  So I jumped into the presentation process.

Framing back. Fortunately with gallery-wrapped canvases (where the canvas is stretched around the supports), there is no real need for frames. The sides are painted. The canvases only need to be wired.

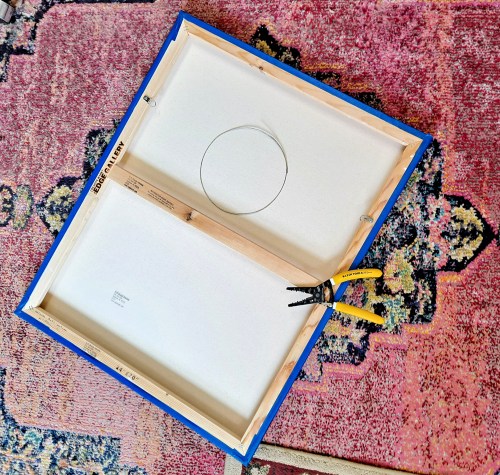
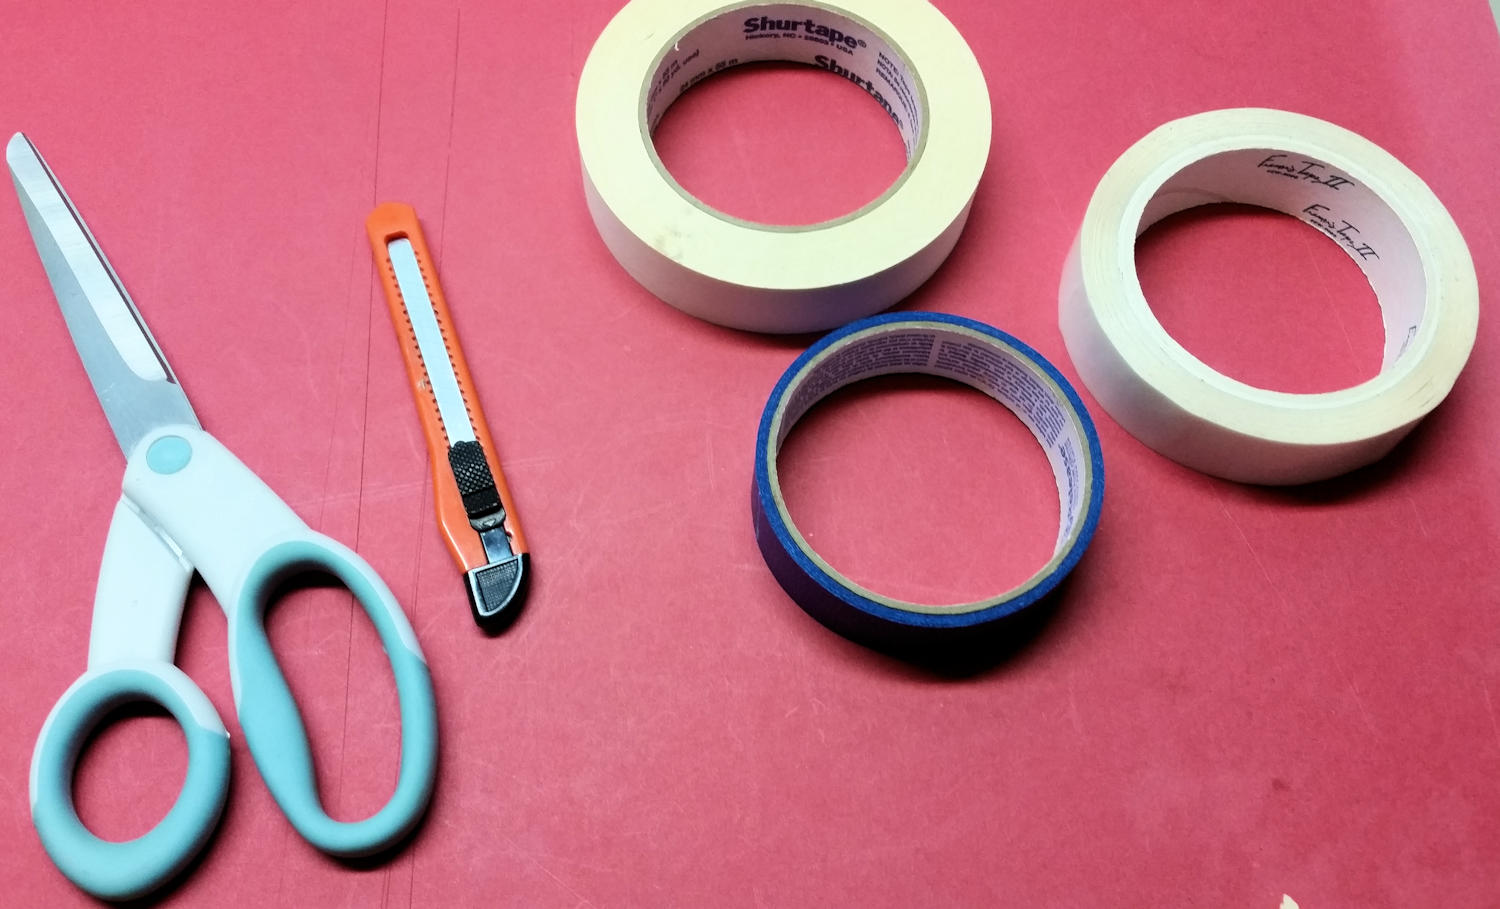
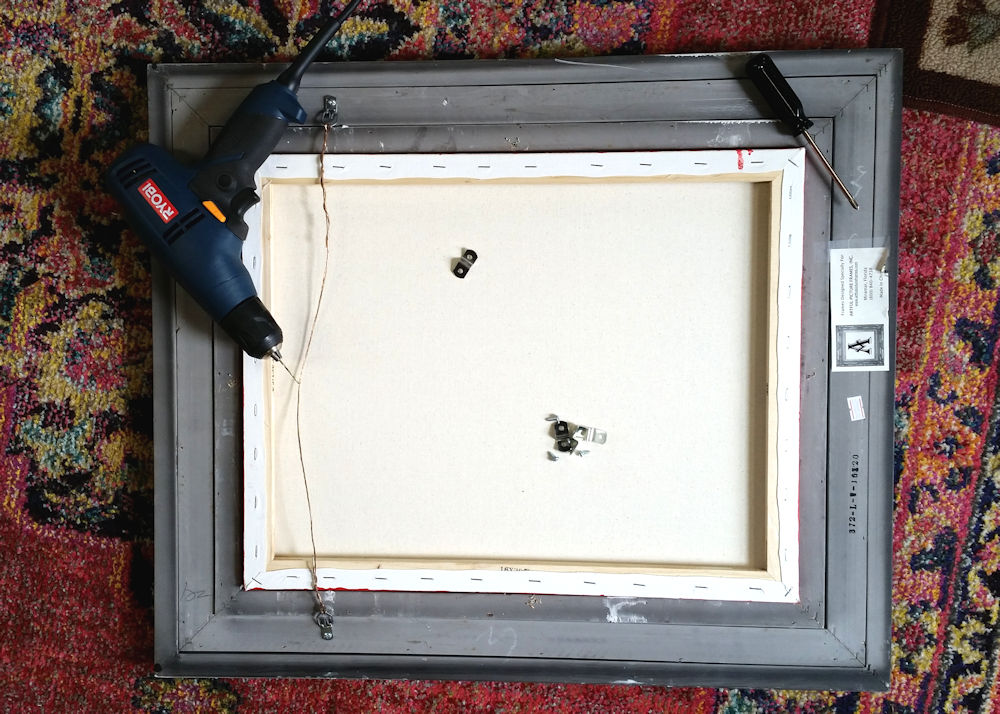
All of the Intimate Spaces: Breaking Bread series are on two inch deep gallery-wrapped canvases.  This means no framing, only wiring.  Actually, the process went rather quickly, especially after I bought special wire snips to cut through the plastic-covered wire.  My professional wire scissors wouldn’t work.

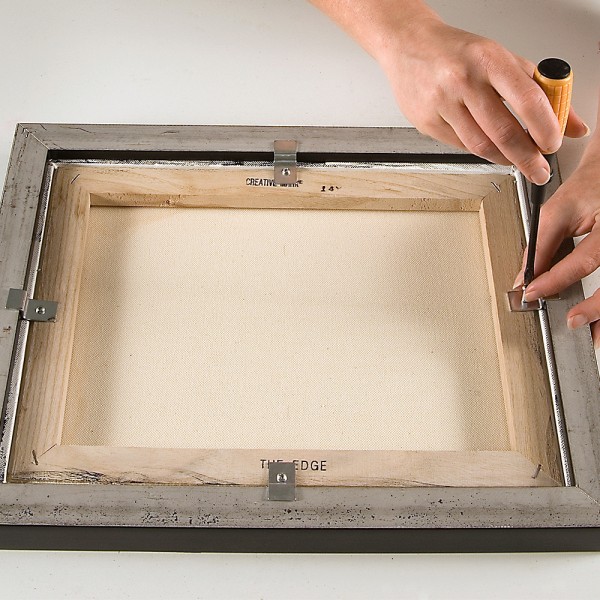
Then I began the process of working on the Intimate Spaces: Beach series paintings.  About half of these canvases are also the deep, gallery-wrapped type.  Those went quickly.  BUT….when I began to frame the rest of the paintings. I realized that I didn’t have the correct hardware.  Plenty of Z clips, but no L clips.  They’re on order. 

Wait. Wait. Wait.

Fortunately, they’re due to arrive on Tuesday.  It won’t take long to finish once they actually arrive.  Remember, I’ve been framing my work for nearly forty years now! 

Anyway, the show is coming together. The marketing materials have been ordered.  The paintings will be delivered on Friday, April 30th.  The show will be hung.  It opens at the new Cultural Center on Thursday, May 6th.  Unfortunately, with the COVID restrictions, there won’t be a public reception. But I will be doing a demonstration painting on Saturday, May 8th from 10 to 2. If you would like a personal tour of the exhibit, let me know and I’ll try to meet you there.

If you’re in the area, please stop by. It’s even worth it to make a special trip.  Some great restaurants in Jasper, especially the Schnitzlebank, a German restaurant that attracts guests from miles around (closed Sundays). Plus, there are many other fine restaurants in the area and lots of neat shops downtown.

Address:  Jasper Cultural Center.  100 Third Avenue.  Turn right (North on Mill Street) and then right again (East) on Fourth street. Plenty of free parking in the rear of the building.

Matting works on paper

Did you receive any artwork for the holidays and are a bit confused about how best to mat and frame them?  This post specifically addresses matting works on paper.  This includes watercolors, pastels, drawings, etc.

These are the simple matting tools that I use for fixing a painting to a mat. (Cutting a mat requires different and specialized mat cutting tools, not addressed here.)

The first point to remember is don’t do anything that could damage your artwork or that can’t be undone.  Do not use scotch tape or other such adhesive products as these can bleed into your art.

Works on paper are typically framed under glass to protect them from moisture, air pollution and other environmental conditions which could harm the art.  They are usually framed with a mat so they are not pressed right up against the glass.  Some exceptions are if the framer uses spacers to keep the artwork from touching the glass but I am not going to address that option today.

Mats can be purchased at art supply and craft stores and even online.  These will usually be standard sizes unless you cut your own or have the store cut one for you.  (This is one of the benefits of using standard sizes.  Check out this link to an earlier post.)  Since I use standard sizes for my smaller work, I purchase museum-grade mats  in volume from an online retailer.

The key with matting a work on paper is that it should only be hinged at the top of the artwork.  This will allow it to “float” in the frame.  Paper is sensitive to humidity and needs to be able to expand and contract.  If you stick it down on all sides, the art will buckle at times.  Certainly not the look you want, I’m sure.

A small painting with a ready-cut mat and backing. The painting has a border around it to allow some flexibility in situating it within the mat.

Small work hinged. I have hinged it all the way across the top.

In this small snowman painting, you can see that I’ve hinged the mat all the way across at the top.  I use my thumbnail to press down on the framer’s tape.  To remove the tape, apply a little heat from a hair dryer.

Snowman, final matting

The second example is a larger painting with an individually cut mat.  Here I have created hinges with vertical strips, then horizontal strips holding the vertical strips.  To help keep the artwork in place while I’m working on it, I use a couple of pieces of removable painter’s tape.  Remember to remove it after you place the hinges.

Matting a larger work. Here you see the border I have left which allows me to situate the painting behind the mat before I begin to work on it.

Use some removable painter’s tape at the bottom to hold the painting in place while you work on the hinges at the top. Remember to remove this tape after you are finished with the hinges.

Large work with first set of vertical hinges.

Large work, second set of hinges. The horizontal hinges hold the vertical hinges in place but do not actually go on the painting.

You can buy framer’s tape at most art supply websites or framer’s stores.  A roll is relatively inexpensive and will last for years.

Large work completed mat. Remember, it is only hinged at the top of the painting which will allow the painting to “float” in the mat.

Mulberry paper is very fibrous and strong. It makes a good alternative to tape for making hinges. However, you will need a separate type of adhesive, usually something like Elmer’s school paste.

A final way to hinge your painting to a mat is to use mulberry paper.  As you can see, this paper is very fibrous and strong.  Just cut hinges in the shape and size as the tape demonstration above.  I used this method extensively at the beginning of my art career.  With larger paintings, such as full size watercolor paintings, you may need to use four or five sets of hinges across.  Then use Elmer’s paste to adhere the hinges to both the artwork and the mat.  Remember, do no harm and be able to undo your actions if you need to.

I hope this helps you to get your new artwork up on the wall. Please don’t hesitate to contact me with any questions.

Useful links:

Jerry’s Artarama framing tapes

Dick Blick framing tape

The drudgery work behind the scenes of being an artist. Packing, framing and shipping.

This is the time of year which finds me packing, framing, and shipping.  My paintings travel from coast to coast, and even overseas!  It’s important to make sure they arrive safely.

Shipping unframed paintings in these shiny pink envelopes gives the customer a nice surprise. The painting is inserted in a clear plastic bag (to prevent water damage), secured between between two pieces of cardboard to give added support and inserted into the bubble envelope for even more protection.

My flat pieces generally are packed in my signature shiny pink envelopes.  I put them in a clear plastic bag, add the shipping information, secure them between stiff cardboard, and insert the whole deal into the envelope.  Larger paintings are wrapped similarly but put in boxes.

Framing a 16 x 20 into a standard size frame. Using Z-clips makes it very easy. I actually took another painting out of this frame which demonstrates the benefit of using standard sizes.

This is also the time of year to prepare paintings for exhibits.  One advantage of painting standard sizes is that I usually have standard sized frames available.  If not, I might slip another painting out of a frame to use.  This is also the benefit of using neutral frames.  In my case, usually black, white or gold with very simple profiles. It’s been a long time since I’ve selected special frames for each painting as it gets very expensive.

Alley, Belgravia Court, Louisville. Acrylic on canvas, 16 x 20, Kit Miracle This is the painting I showed a few weeks ago. The simple frame is versatile and will suit many painting subjects.

Beginning arts professionals often don’t realize that they may spend about half of their time doing the mundane tasks behind the scenes – framing, preparing canvases, paperwork, shipping, delivery – than actually spent in front of the easel.  The final exhibit or sale is the icing on the cake.  I think this is probably true for any arts professional, not just visual artists.  Being a successful artist also means being a good business person.  Paying attention to procedures, cutting costs where you can, and making your customer happy it what it really takes to make a living in the arts.

How to save money by using standard size canvases and frames

A selection of frames from Michaels. There are MANY MANY to choose from.

I am often asked, “You mention standard sizes in your painting and framing, but what does that mean exactly?”

Good question.

For many centuries, artists have been unrestricted to the size of their wood panels, paper or canvases, so their wonderful creations could be all over the place with regard to size.  This is fine for creativity, but it gets expensive to frame paintings.  The reason is that unusual sizes call for custom frames, thus the expense.  Yes, one gets many more options, but if you’re on a budget, you may wish to stick with artwork which conforms to standard sizes.

Canvas sizes and frame sizes.

In my work, I buy boxes of canvases and canvas panels (wood or heavy cardboard covered with canvas), and even use custom wood panels cut to standard sizes.  This saves me money by purchasing in quantity which, in turn, I can pass along the savings to my customers.  Yes, I still will stretch linen or cotton canvas on stretcher bars if I want a certain size which is not readily available, but that is my choice and is usually for larger paintings.

Since watercolors (and other works on paper) require a mat to separate the painting from the glass, I am cognizant of of the sizes of ready-made mats and frames.  For instance, most of the watercolor/pen and ink paintings on my My90Acres Etsy shop are 4 x 5 inches, which I mat to 8 x 10.  All the mats are museum-grade rag mats in a soft white color which I purchase in bulk directly from the manufacturer.  This allows the buyer to purchase an 8 x 10 frame and have the painting hung in minutes.  Many of the larger watercolor paintings on my KitMiracleArt Etsy shop will also fit standard frames with mats (my bigger works don’t come with mats).  Where the store-bought mat says that it will fit an 11 x 14 inch painting or photo, the mat opening is usually cut to 10.5 by 13.5 inches but you can measure them in the store.

A selection of frames from the big box store. Some come with mats and some without. You can also toss the glass if you don’t need it.


So where can you buy frames and mats to save money?

There are many wonderful stores online where you can buy frames and mats of standard sizes.  Some of my favorites are:  PictureFrames.com, Jerry’s Artarama, Dick Blick, and even Amazon.  Some websites even allow you to upload a photo to try it out in the frame you are considering. Also, oil paintings are not usually framed under glass.

If you prefer to see the frames in person, there are plenty of stores which can meet your needs.  Michaels and Target come to mind.  Many of the big box stores have a good selection of ready made frames, with or without mats. I have even been known to buy a frame with a cheap print in it and throw away the print!  Hey, whatever works.

One word of caution if you are framing a painting on canvas, is to consider the depth of the frame, i.e., the rabbet.  A thicker canvas will require a frame with a thicker depth.  You will probably need some special clips to keep the canvas in the frame, but many of these are sold with the frame or can be added for a very small charge.

Attaching a canvas into a frame with canvas clips. These come in various sizes depending upon the depth of the frame.