

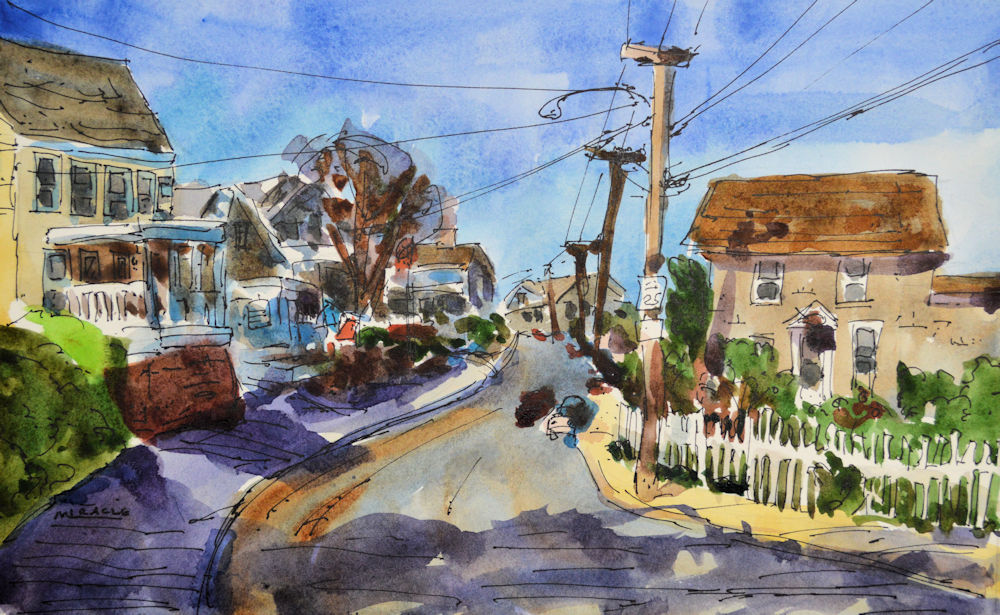
Rockport, MA. Watercolor, pen and ink, 10.5 x 14, Kit Miracle
There are many styles of watercolor with pen and ink overlay. Some artists do the pen and ink drawing first and then add the watercolor washes on top. If you use this method, you must be sure that the ink is totally waterproof and won’t smear once the watercolor hits it.
In my case, I draw a pencil sketch first before adding the watercolor washes. After it is totally dry, I then go back and add the pen and ink details. I have used this method for twenty-five years but I suggest that you experiment with several methods to find what works best for you.
All of the small paintings shown on my Etsy shop My90Acres are created this way. I like the looseness that this method allows me. If I were to draw the object first in pen, I would have a tendency to get too bogged down in the details. Then adding the the watercolor would feel more as if I were “coloring in” the painting. This seems to make the painting more static without much life, good for medical illustration but not the look I’m after.
I always begin a new wc/pi painting by marking off the outside edge of the painting (adding an extra ¼ to ½ inch) and then taping it down to a drawing board. I use at least 140 pound watercolor paper. Sometimes I’ll use painter’s tape but actually, regular old masking tape will work just fine if you’re not going to keep it on the board for months. A few weeks will be fine but you’ll probably be done with the painting before then. Taping the painting to the board will help reduce any buckling when the watercolor is applied.
The next step I take is to make a loose sketch on the paper. Be sure not to press too hard with your pencil or to do too many erasures as it will bruise the paper. Bruised paper will create dark splotches when the watercolor hits it; not an attractive sight unless that is the look you’re going for.
After the sketch, I apply layers of watercolor, usually working from light to dark. A hairdryer will speed up drying time between layers of paint. After the paint is totally dry, then I begin to add the ink drawing. I always start with the more complex parts of the painting, such as, the buildings. I might even carefully use a ruler for the straight lines, but the painting will look fresher if you just freehand it. The ink is just used to loosely add details; you don’t need to put in every brick and board, every blade of grass or leaf. Simplify the shapes and let the viewer’s eye fill in the rest.
Finally, after your painting and the ink is totally dry, you can use a plastic eraser to remove some of your pencil lines if they are still showing. Really! I don’t know how this works, but it does.
Take a look at these three paintings of Rockport, Massachusettes. Click on the paintings to examine some of the details.
Part 2 of this post will explore some of the materials and other techniques.
Main Street, Rockport,Massachusetts. Watercolor with pen and ink. 6.5 x 9.5 Kit Miracle

Beach at Rockport. 6.5 x 9.5 Watercolor, pen and ink. Kit Miracle

These are stunning. Thank you for the instruction on how you created this look.
LikeLiked by 1 person
Thank you very much, Robin. As I said, I’ve been doing this a long time. Every artist has a different style and mine is pretty loose.
LikeLike
Really helpful post – and charming landscapes – thank you!
LikeLiked by 1 person
Thank you very much. Stay tuned for the next part on this subject.
LikeLiked by 1 person