
It seems hardly a day goes by that I don’t get a catalogue or an e-mail trying to sell me art supplies and gadgets. Oh, look, newer, better, scientific! You’ve got to have this latest gizmo! This will ensure your success and you’ll be the best in your field.
This is true not only for artists, but golfers, automobile enthusiasts, bikers, campers, what have you. It seems as if the only people getting rich are the ones who keep trying to sell you things.
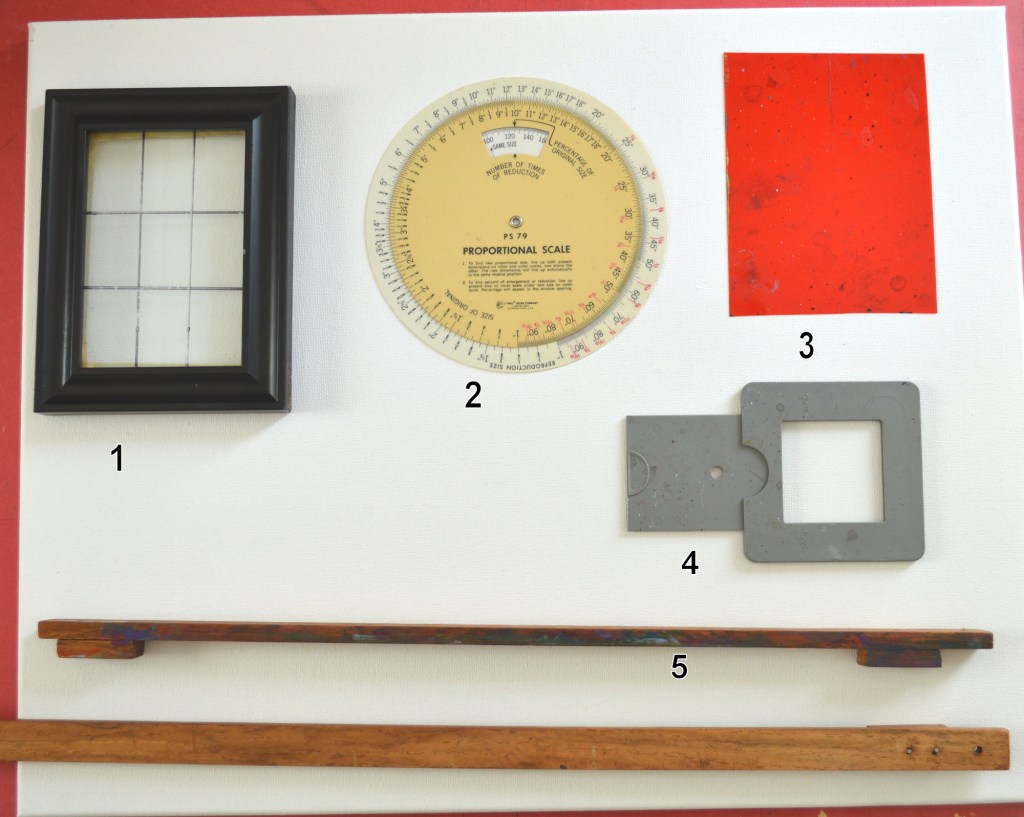
But as an artist, I always like the challenge of trying to do things myself. I guess that’s why I’m in a creative field. Here are five very simple tools that I use in my studio or outside. Three I made myself and the other two can be purchased for less than ten dollars each.
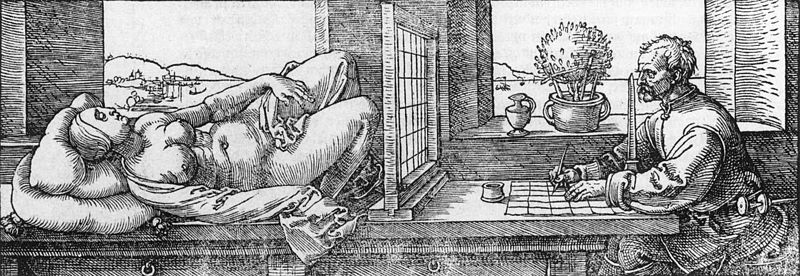
1. The first tool is a simple composition aid made from a small 4 x 6 frame with the glass taped in. On the back side, I’ve divided it into nine sections with a permanent marker. I got the idea from an old drawing (Durer) of an artist who had created a standing frame divided into squares by threads. He then divided his paper into squares, and then transferred what he saw in each square as he was viewing an object, into the respective square on his paper. This same technique is used today for blowing up drawings.
In this case, I take the little frame and hold it up in front of a landscape, and draw with a felt pen on the front side. This can be used for still lifes, figurative works, street scenes, whatever. The trick is to keep the frame and my eye at the same level for the few minutes that I need to sketch on the glass. Then I transfer the image to my paper or canvas. Sometimes it’s amazing how different the actual drawing looks from the way my eye wanted to read it. I’ve used this technique in teaching third graders up to adults. Now, of course, you can buy a similar ready-made frame but these were not available when I first made mine.
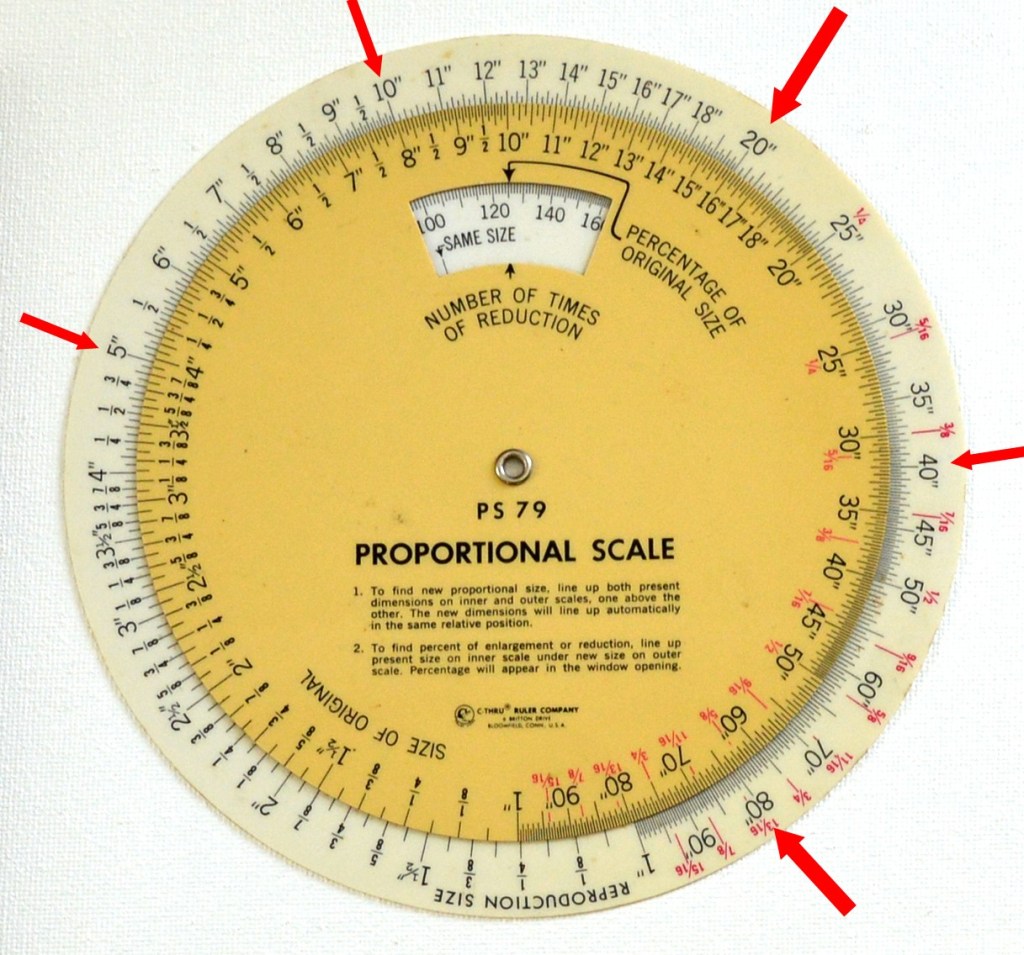
2. Proportion scale. I’ve had this little plastic tool for so many years that I forgot where I bought it. It is so easy to use for both reducing and increasing sizes proportionally. Just line up the numbers of say, a 20 x 16 and then everything else on the scale will be proportional to that, 10 x 8, 5 x 4, 40 x 32, 80 x 64 and everything in between. Or maybe you have a canvas of a certain size but you need to make adjustments in your drawing to fit; the proportion scale can help you do this. Less than $10 online.
3. Red gel sheet. I used to have access to colored gels (used for lights) when I worked in the theatre business. These scraps are useful, particularly this red gel. Hold it up in front of a green landscape, and it immediately grays everything out so you’re only left with values. Commercial products are available now but you can probably get gel scraps from your local theatre or playhouse for free. See previous post here.
4. The View Catcher has been around for a long time. Made of grey plastic, the little slide opens the window to a variety of sizes from square to rectangles. Marks on the plastic indicate the scale of the window (8 x 10, 11 x 14, etc.) Less than $10. We used to use old film slide windows but no one knows what those are anymore.
5. Painting bridges. When I painted a lot of watercolor, particularly architectural images, it was helpful to have a steady hand when drawing the lines. I made these two bridges from some wood scraps. They kept my hand off the paper and from smearing the paint or ink. Also, they were very helpful for guiding my pen when drawing lines. My cost was nothing but now you can buy plastic ones for about $35. I like free.
I hope these useful art tools will inspire you in your quest to be more creative. And don’t be afraid to make something of your own invention, too.
