Category Archives: recipes

Soup and art

Painting of the soup for lunch from my Food We Eat series. Served with homemade rye bread. Yumm.
https://www.etsy.com/listing/768213998/hot-soup-cold-day-original-painting-food?click_key=da66bb4eb481aab6e58af5f42436aeb49e12fe6c%3A768213998&click_sum=655420f4&ref=shop_home_active_9&pro=1&frs=1

Cold weather seems to bring on an appetite for hot soup.  We make a variety of soups here on the farm not only because they are tasty and filling, but it’s also a good way to add those veggies into the diets of some people who claim they don’t like vegetables.  We never make small batches of soup around here either so this is as small as it gets (an eight quart pot).  Plenty to eat for a couple of days and plenty to share.

The other day I made one of our favorites, Thick Kale Soup.  Don’t like kale?  You will love this soup. My granddaughter says this is her favorite soup. I actually posted this recipe a few years ago but it bears repeating.

Simple ingredients:  smoked sausage, onions, garlic, kale, potatoes, white beans, broth and spices.  That’s pretty much it. Got company coming?  Add more broth, potatoes and another can of beans.

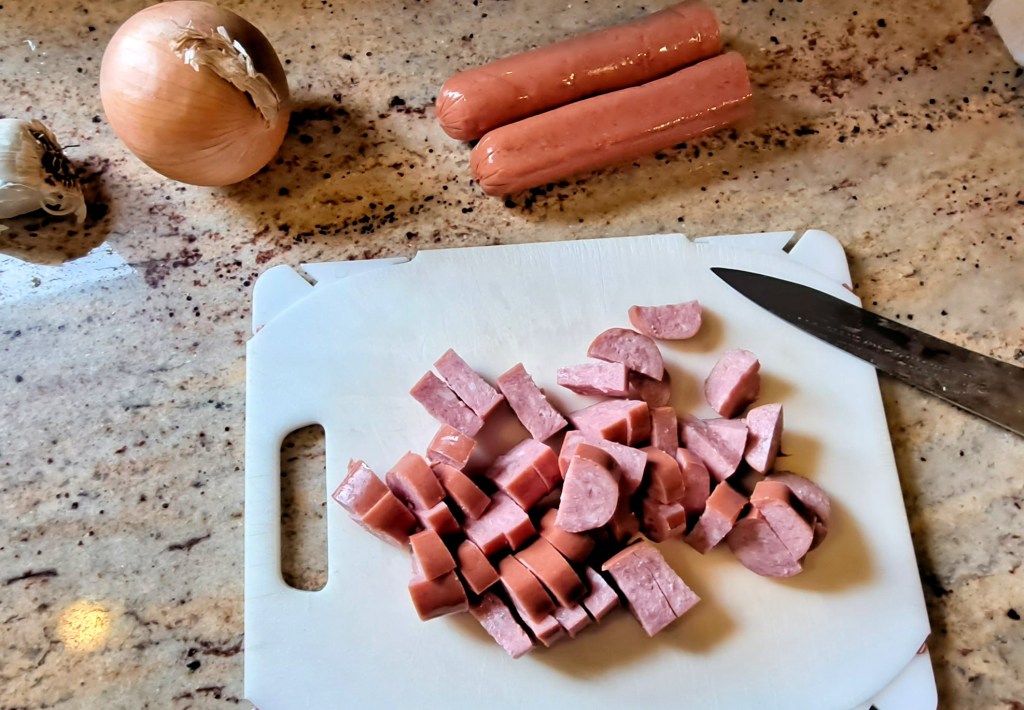
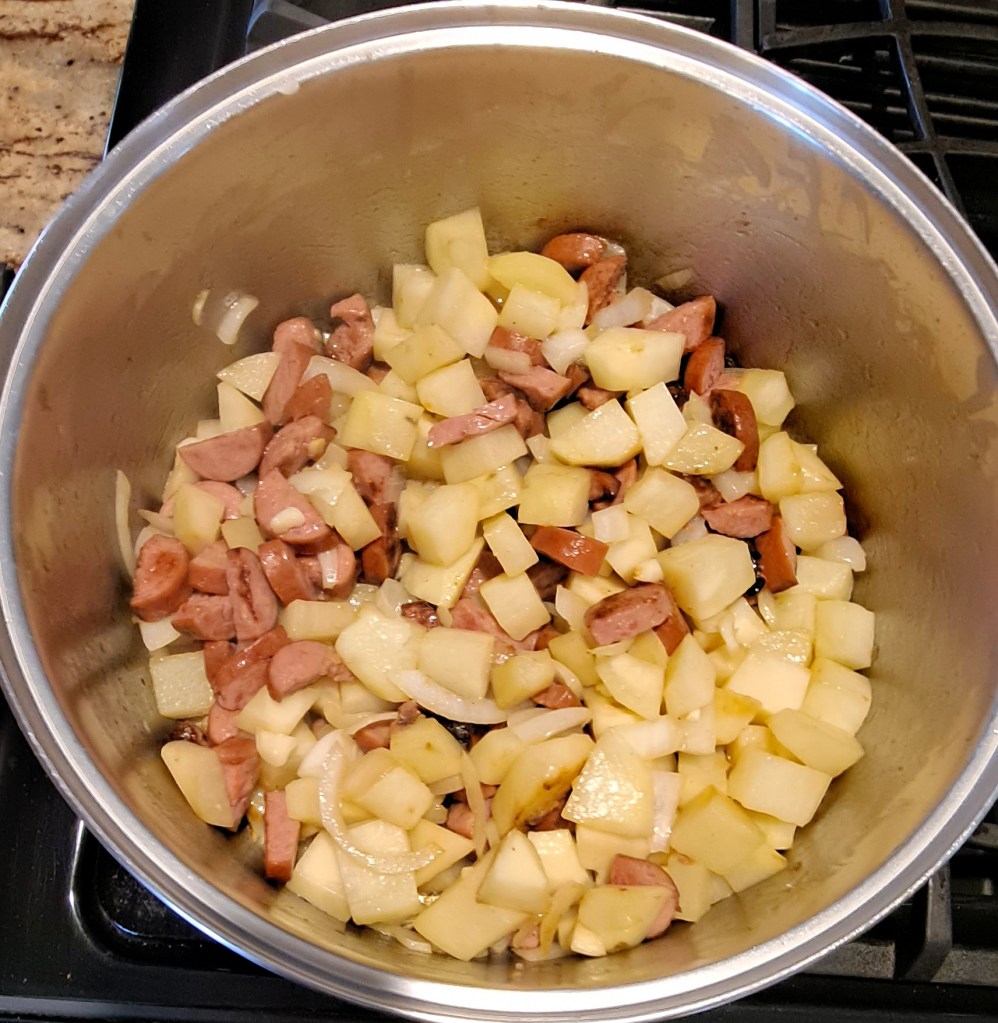
Heat the olive oil in a 6 – 8 quart soup pot.  Add the chopped smoked sausage.  You can use any kind of smoked sausage – regular, light, turkey, or even Polish kielbasa. Stir and brown.

Add the chopped onion and stir until clear.  Add the minced garlic.  Keep stirring so they don’t burn.

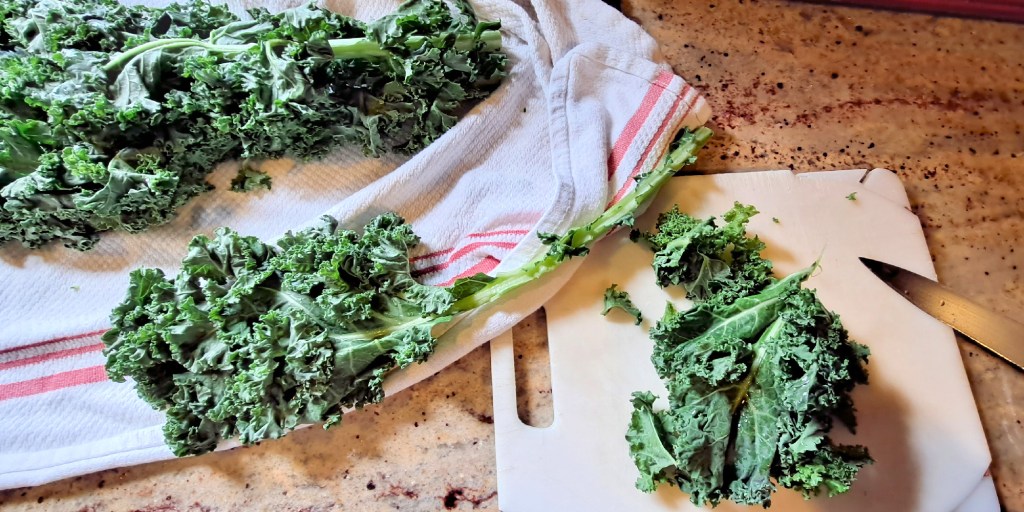
Meanwhile, wash and strip the veins out of the kale.  Rough chop and add to the mixture, stirring until wilted.  Add the chicken or vegetable broth and cover. Bring to simmer.

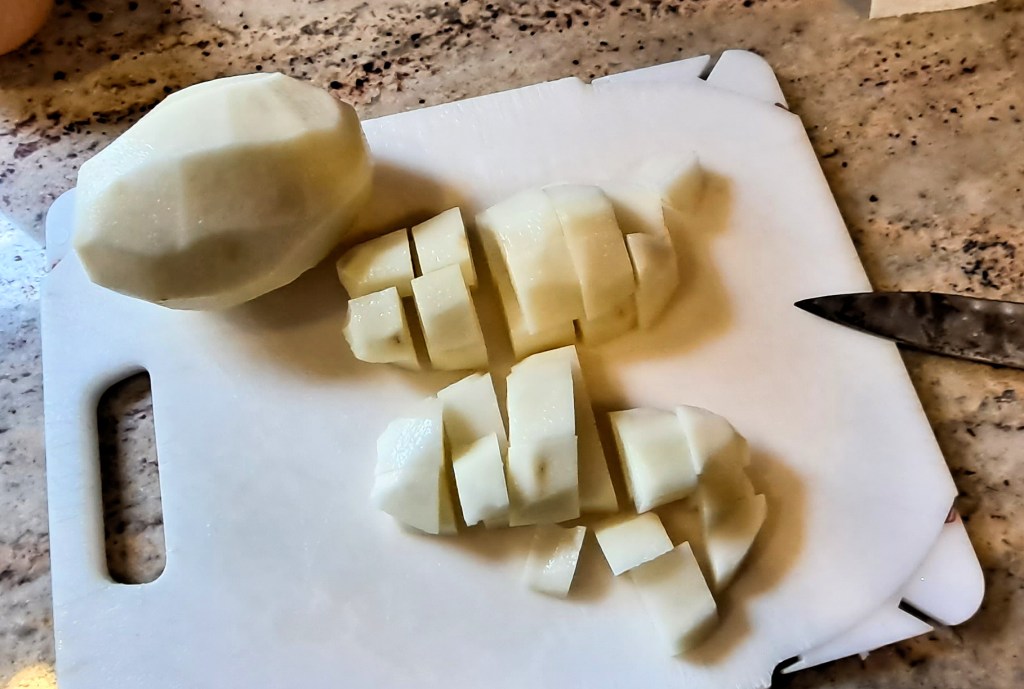
Wash and dice the potatoes.  Sometimes I leave the peel on just for added texture. Add to the pot after it comes to a slow boil.  Cover and bring back to simmer.

When the potatoes are cooked (about 15-20 minutes), use an old fashioned potato masher and rough mash them in the pot.  This just helps the soup to thicken.

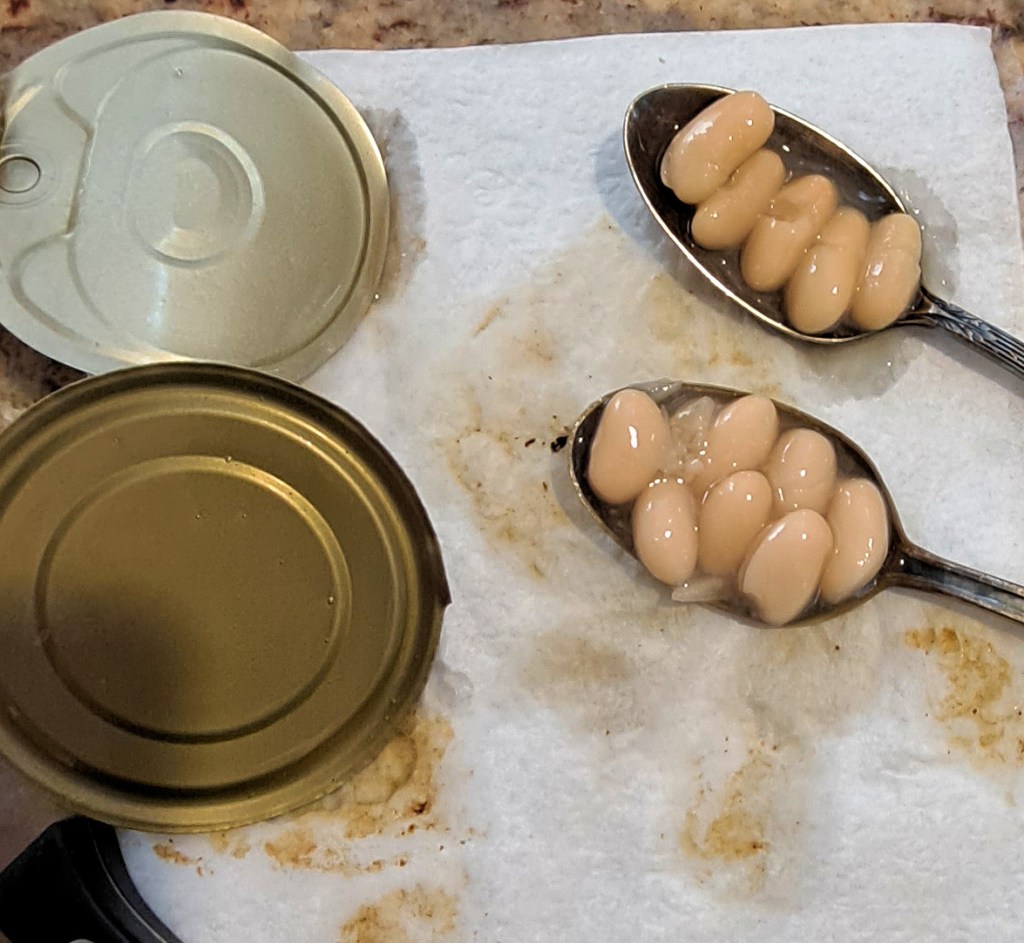
Then add the two cans of beans (drained).  Frankly, I just use whatever white beans I have available.  I’ve even added butter beans and it works fine.

This is the final kale soup should look like.

Add the cracked pepper to taste.  You probably won’t need any salt as the sausage is pretty salty, but suit yourself. I often use a couple of bouillon cubes to add salt, plus always some garlic powder. 

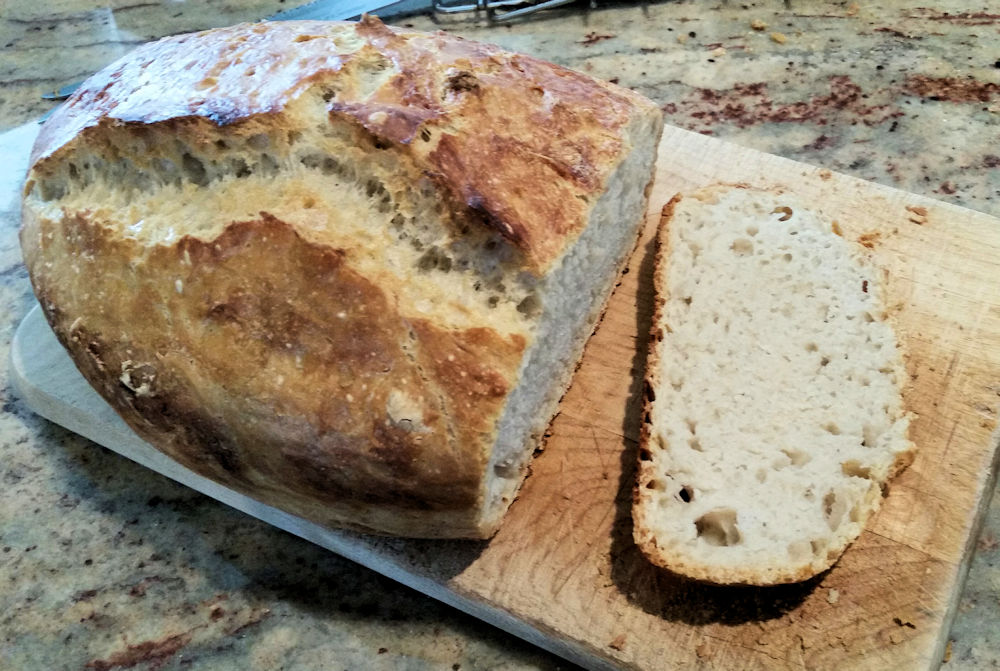
Serve with crusty bread for a filling lunch or dinner.

Thick Kale Soup, the final product.

Bread and Miriam

Bread and Miriam. My friend is delighted to display her new painting. We had such a fun morning visiting, talking about books and life.

I had the great pleasure of hand delivering my painting Bread to my friend Miriam.  She was so delighted to be able to buy this.  “Making this bread was the best experience of my time during the COVID pandemic.”  Miriam used my bread recipe for no-touch sourdough bread.  I heard back from so many friends and blog followers that they loved this recipe. 

Still need some bread?  Check out this post from last year. https://my90acres.com/2018/03/28/crusty-artisan-bread/ https://my90acres.com/2020/08/02/bread-a-new-painting/

Summer Super Sale still going on.  40 to 70% off.  Adding more every day.  Check here to see what is currently on sale.  Or contact me personally if you’re nearby and I’ll deliver. https://www.etsy.com/shop/KitMiracleArt?ref=l2-shop-info-name&section_id=1

Low carb pizza

Low carb pizza

If you’ve been following this blog for awhile, then you saw the recipe for the crusty artisan bread that I posted earlier.  My husband loves to make bread of all types, white, whole grain and multigrain.  Unfortunately, all this bread has consequences.  His doctor advised him last year to cut back on the carbs.  Drat!  No bread. No pizza.  Bah!

So I came up with this low carb version of pizza last year which is made from, yes, cauliflower.  Let me just preface this by saying, although we LOVE vegetables in this house, I doubt that a cauliflower has ever crossed our threshold since we’ve lived here…30+ years.  Blech.  A white vegetable that isn’t potatoes?  No way.

However, we are open-minded people so I did some research and this is what I came up with.  No, it does not taste like cauliflower…at all!  Yes, it does taste like yummy pizza.  If you’re watching your carbs, give this recipe a try.  You might like to make two crusts if you’re going to the trouble.  You’ll want to repeat this again.

Ingredients:

  • One large head of cauliflower
  • One egg
  • Goat cheese
  • Salt and pepper
  • Decorations for the actual pizza, your choice– your favorite sauce, herbs and spices, peppers, onions, olives, garlic, sausage, pepperoni, veggie crumbles, cheeses (Romano, mozzarella, etc.)

Steps:

  1. Preheat oven 425 degrees
  2. Cut up cauliflower into same size flourettes

    Cauliflower flourettes

  3. Add ½ c water, cover with plastic wrap with one side open to let out steam, and steam in microwave until medium soft, about 15 minutes. You may need to stir these every five minutes or so.  It shouldn’t be mushy but just al dente.
  4. Run through food processor until just riced, (not mashed). You may have to do this in batches.

    Steamed flourettes after ricing in food processor, about 20 seconds

  5. Place riced cauliflower in clean, dry kitchen towel, stir a bit to let cool, then squeeze ALL the water out that you can. The more you squeeze, the crustier your pizza crust will be.

    Riced, steamed cauliflower in clean, dry towel before squeezing

    Squeezing out moisture from the steamed, riced cauliflowe

    Riced, steamed cauliflower after squeezing moisture out.

  6. Add egg, goat cheese, salt and pepper and stir.
  7. Press onto parchment-lined pan. You want about ¼ inch with a little higher crust on the edges.

    Cauliflower Pizza crust, baked

  8. Bake 20-25 minutes or until browned on the edges.
  9. Decorate pizza as usual with your favorite toppings.
  10. Lower temp of oven to 375 and bake for another 20-25 minutes until it looks like a pizza.
  11. Cauliflower Pizza, final, baked.

There you go! You’ll be surprised that you can actually hold this like a piece of regular pizza. It does NOT taste like cauliflower.  Manga!

Crusty Artisan Bread

Crusty Artisan Bread

It’s been a raw and unpredictable March with rain, wind, snow, what have you.  If you’re still stuck indoors, here is a VERY EASY and VERY GOOD bread recipe. My husband is the bread maker around here and has many favorites, but this one seems to be a hit with everyone.

Don’t be afraid.  Just do it!  You don’t even have to touch the dough or knead it.  Perfect crusty artisan bread.

Ingredients

  • 5 cups of flour
  • 2 1/2 cups of water
  • 2 teaspoons of salt
  • 1 ½ teaspoons of dry yeast

Day 1

Combine all the ingredients in a large bowl and stir to incorporate.  Cover well with plastic wrap.  Let sit out on the counter overnight (12-18 hours).

Bread in enamel pan

Day 2

You will need an enamel roaster pan with lid.  This should be small size.  The old speckled kind that your grandma used to have will be fine. (Our pan is elongated but a round one works fine, too.)

  • Put the roaster pan and lid into a cold oven.
  • Turn on the heat to 450 degrees
  • When the oven reaches 450 degrees, take out the pan (carefully) and sprinkle with corn meal. (No grease or oil.)
  • Pour the bread mixture into the hot pan, replace lid and bake for 30 minutes
  • Remove the lid and bake another 20 minutes
  • The bread should tip out of the pan easily. It will be crusty on the outside and moist on the inside.

You may add other ingredients when assembling on day 1, such as, dried herbs.

That’s it!  Serve with a pot of homemade soup.  Your friends and family will think you’re a genius.